 Showers are one of the greatest challenges for a tile contractor. Not only does it have to look great, but it has to work great and send the water down the drain where it’s supposed to go. Some homeowners in East Nashville called me to add lots of tile to their bathroom, starting by removing a vinyl shower surround and doing a custom tile shower with a glass enclosure.
There are many things to consider when embarking on a project like this. One of the most important things is to make adequate preparations for the glass enclosure INSIDE the wall. Even though they will give you some drywall anchors with most enclosures, it’s much better to think ahead and put some studs exactly where you’ll be attaching the enclosure to the wall, especially the side holding the door. You don’t want that to pull away and leave a gap and make the door unable to close.
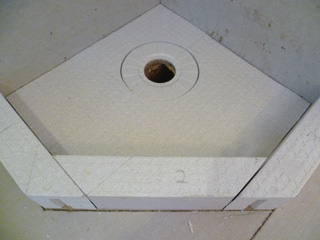
 For my shower projects I use a waterproofing system from Schluter called Kerdi. It consists of a fabric membrane that is applied to all the walls and floor that results in a completely waterproof shower. It’s so good it can be installed over drywall! For convenience they sell all the pieces for a complete shower in a kit with some variation depending on the size of your shower. The kit has the Kerdi membrane, the Kerdi drain and some fancy Kerdi pieces made especially for inside and outside corners. It also comes with a pre-sloped tray for the floor of your shower.
The pre-sloped tray is made out of some kind of foam and can easily be cut to fit your shower with just a simple hand saw. The tray is set in mortar and then you apply the membrane over the top. By the way, the old fashioned way of doing it meant you’d build a sloped floor using a type of mortar called ‘deck mud” or more commonly just called “mud”. It’s a lightweight, sandy mixture that can be used to build the floor however you like. This way worked, but it is slower and takes more expertise and mess.
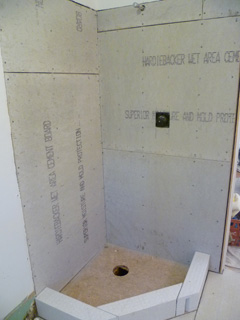
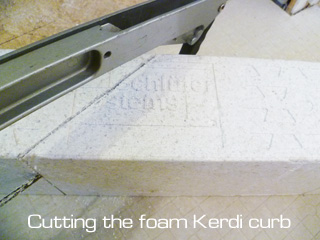
This shower is a Neo-Angle shower, which is fancy way of saying the door is at the corner of the unit rather than one of the sides. I prepped the walls with cementboard and then went to work on the curb. The Schluter kit actually comes with a foam curb for your shower. This is great, but for a neo-angle, you’ll actually need two of these to have enough and you’ll have to cut them to get the shape that you want.
 To build the curb, I started by tracing the outline of the shower on the floor.o To get the correct measurements I had to study the instructions that came with the enclosure. You want everything to fit when you’re finished and have some nice margins that make it look like it was done right. After I know the outline of the curb, I needed to cut the foam to fit the angles. This is where my Johnson sliding T-Bevel comes in very handy (see this post for more info). It allows me to copy the angle from the floor and transfer it to the foam. Then I cut it with my hacksaw.
Once all the curb pieces are cut and I’m happy with the fit, they are set in mortar just like the floor of the shower.
With the curb and pre-sloped floor in place, I’m ready to install the Kerdi waterproofing membrane. I’ll address that in my next post…


Lisa O'Donnell
August 21, 2011 , 5:27 pm
Peter Bales
August 22, 2011 , 8:28 am
Michael
April 26, 2012 , 6:02 pm
Peter Bales
April 26, 2012 , 7:04 pm
Michael
April 26, 2012 , 8:23 pm
Peter Bales
April 26, 2012 , 8:32 pm