 The old tile surround at this Green Hills condo was not in good shape. Water had gotten behind the tile in the corner and damaged the surface below, which turned out to be drywall.
Somewhere along the way the tile in this area had already been replaced. You can tell because the tiles don’t really match. In addition to fixing the issues, the plan was to extend the new tile all the way to the ceiling.
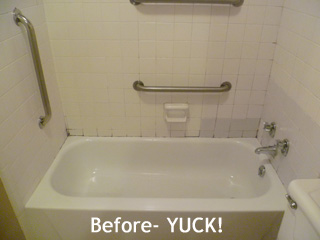 Removing the old tile was way too easy. Even the tiles in the undamaged area came off with just a little pressure, leaving the drywall beneath in great shape where it hadn’t met with water.
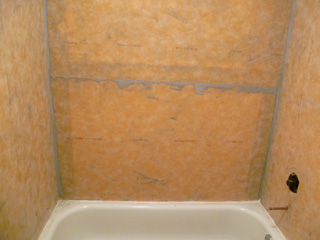 The next step was to replace the damaged portion with some 1/2″ Hardibacker and then cover the walls with the Kerdi waterproofing membrane. I use this product for showers to provide a completely waterproof envelope. It works great for tub surrounds as well and can be installed right over sturdy drywall, even in a shower!
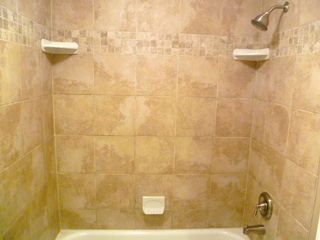
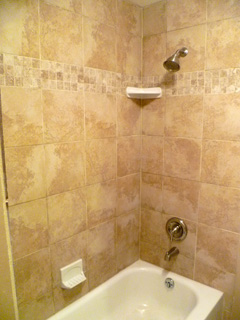 The tile design for this shower would include a stripe of smaller mosaic tiles as well as a couple corner shelves and a soap dish. All of this has to be planned out ahead of time as well as considering how the tile will intersect the tub and ceiling. I always try to avoid awkwardly small pieces anywhere if I can.
Laying tile all the way to the ceiling does involve more tile and more labor, but the effect is quite dramatic. It’s amazing how different it feels when the tile doesn’t just stop at the shower head. It makes for a more luxurious shower that also prevents over-spray from causing mildew or other issues to the walls above the surround when they are just painted drywall.
It’s hard to capture the effect with a photo, but hopefully you can imagine the difference that a little more tile makes.
This bathroom makeover was fun to be part of because of the huge difference it made to not only get that carpet out of here, but also do work with a great tile design.

