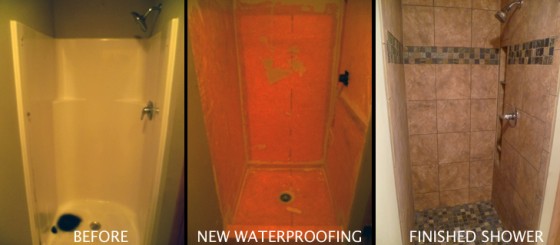
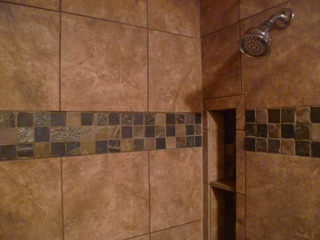
 Here’s a shower I just finished for a family west of Spencer in Owen County Indiana. They had an older acrylic shower surround that had a crack in the floor. Not exactly heavy duty, I guess! Anyway, it was an excuse for them to upgrade their bathroom with a new tile shower.
The first step was to disconnect the shower head and get the old enclosure out of there. It was all one unit so that meant I had to cut it into pieces just to get it out. Next I reinforced the floor with another layer of 3/4″ plywood and replaced the shower head. I also raised it up a few inches. Like many showers out there, the old showerhead was a bit too low for some people.
Where the enclosure had been, I installed cementboard on the walls and the Kerdi waterproofing membrane to make sure the water stays in the shower and actually goes down the drain. Kerdi is made by a company called Schluter Systems and is a fantastic product to create a custom waterproof and vaporproof shower of any shape or size.
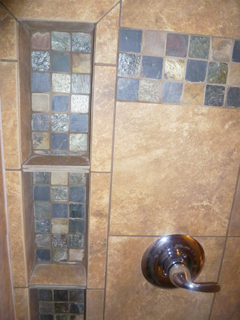 Once special feature of this shower is the tall corner niche. The homeowner wanted some shelves for all her lotions and bottles so they wouldn’t have that old wire shelf hanging from the shower head anymore. The other walls didn’t have a suitable spot, so we had to put it here next to the valve. It was skinny, but I was able to make it around 48″ high with a small shelf for a bar of soap and then three other shelves for bottles. To create the niche I made one large cavity and covered it with cementboard and waterproofing. The shelves aren’t put in until I’m tiling and consist of just a couple tiles sandwiched together with mortar in the middle. They are placed so that they will rest on the tile that’s on the sides. A niche like this still takes quite a while to install, but those simple shelves do help things quite a bit.
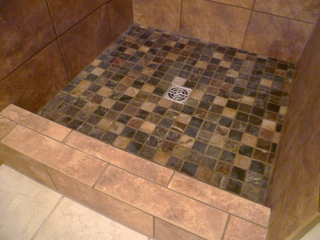 My clients found this tile at Owen Valley Flooring. The walls are a 13″ square porcelain tile, while the floor and decorative stripe are a mosaic of 2″ slate squares. She was even able to order the matching bullnose tile for all the edges and outside corners. Bullnose tile had one edge that is rounded over rather than square. They are typically 3″ wide by the dimension of your field tile. I’ll sometimes offset them, as I did with this project by staggering them withe the field tile, or you can line them up with the rest of the grid. The bullnose pieces are especially nice around the niche.

