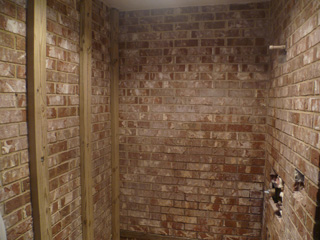
 I haven’t had to tile over many masonry walls. This shower in Freedom, IN started out as a bathtub in a brick addition. It was meant to be permanent, but the homeowners decided they wanted a tile shower. What’s the easiest way to tile over a brick wall? Kerdi-Board.
Of course, you could try tiling directly on the brick, but it’s probably very uneven, making it quite difficult to end up with a nice flat tiled wall.
Another option is to add furring strips everywhere and then cementboard or drywall. That works, but 1. You end up with a smaller shower and 2. It’s a whole lot more work!
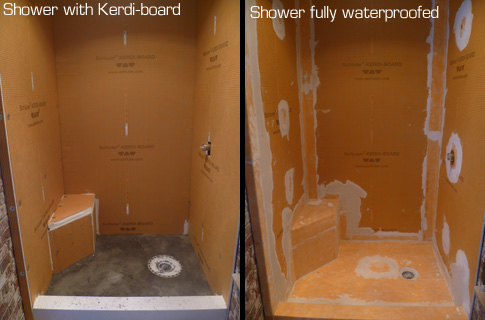
Kerdi-board comes in various thicknesses and sizes, but I usually use the 1/2″ thick 4′ x 8′ sheets. It’s basically a foam board that has the Kerdi waterproofing on both sides. It can be used instead of drywall or cementboard in most tile projects and it’s waterproof! You just have to seal the corners and any screw holes.
To apply it to a masonry wall you just need to toss some nice blobs of mortar onto the wall in a grid around 16″ apart or so. Then you press the board onto the blobs of mortar. Use a level and you can press it down until the entire thing is plumb. Schluter has a fantastic Kerdi-Board video (go here) that shows this process over a cinder-block wall. I did it over a brick wall and it worked great!
One wall of this shower did have to be furred out with some wood nailing strips because I needed the shower to be just a little smaller so we could use a stock shower door to finish it out. Otherwise I could have applied the Kerdi-board to each wall in the same way.
Notice I also used some thicker 2″ Kerdiboard to make a corner bench. You can build about anything with the stuff and it’s strong and stable. Ready to tile over after you’ve finished the waterproofing. The downside is that Kerdi-board can be hard to find and it’s expensive. However, from my calculations the labor cost saved by using Kerdi-board makes it a no-brainer for many of my projects.


