
 A project like this really stands out. When I got there the homeowners had already gutted this bathroom in Bloomington, IN, except for the slate flooring which they liked. My job was to help them imagine a totally new space that would be an amazing place to start the day.
See the photo gallery here.
See the hi-res photos on Houzz.
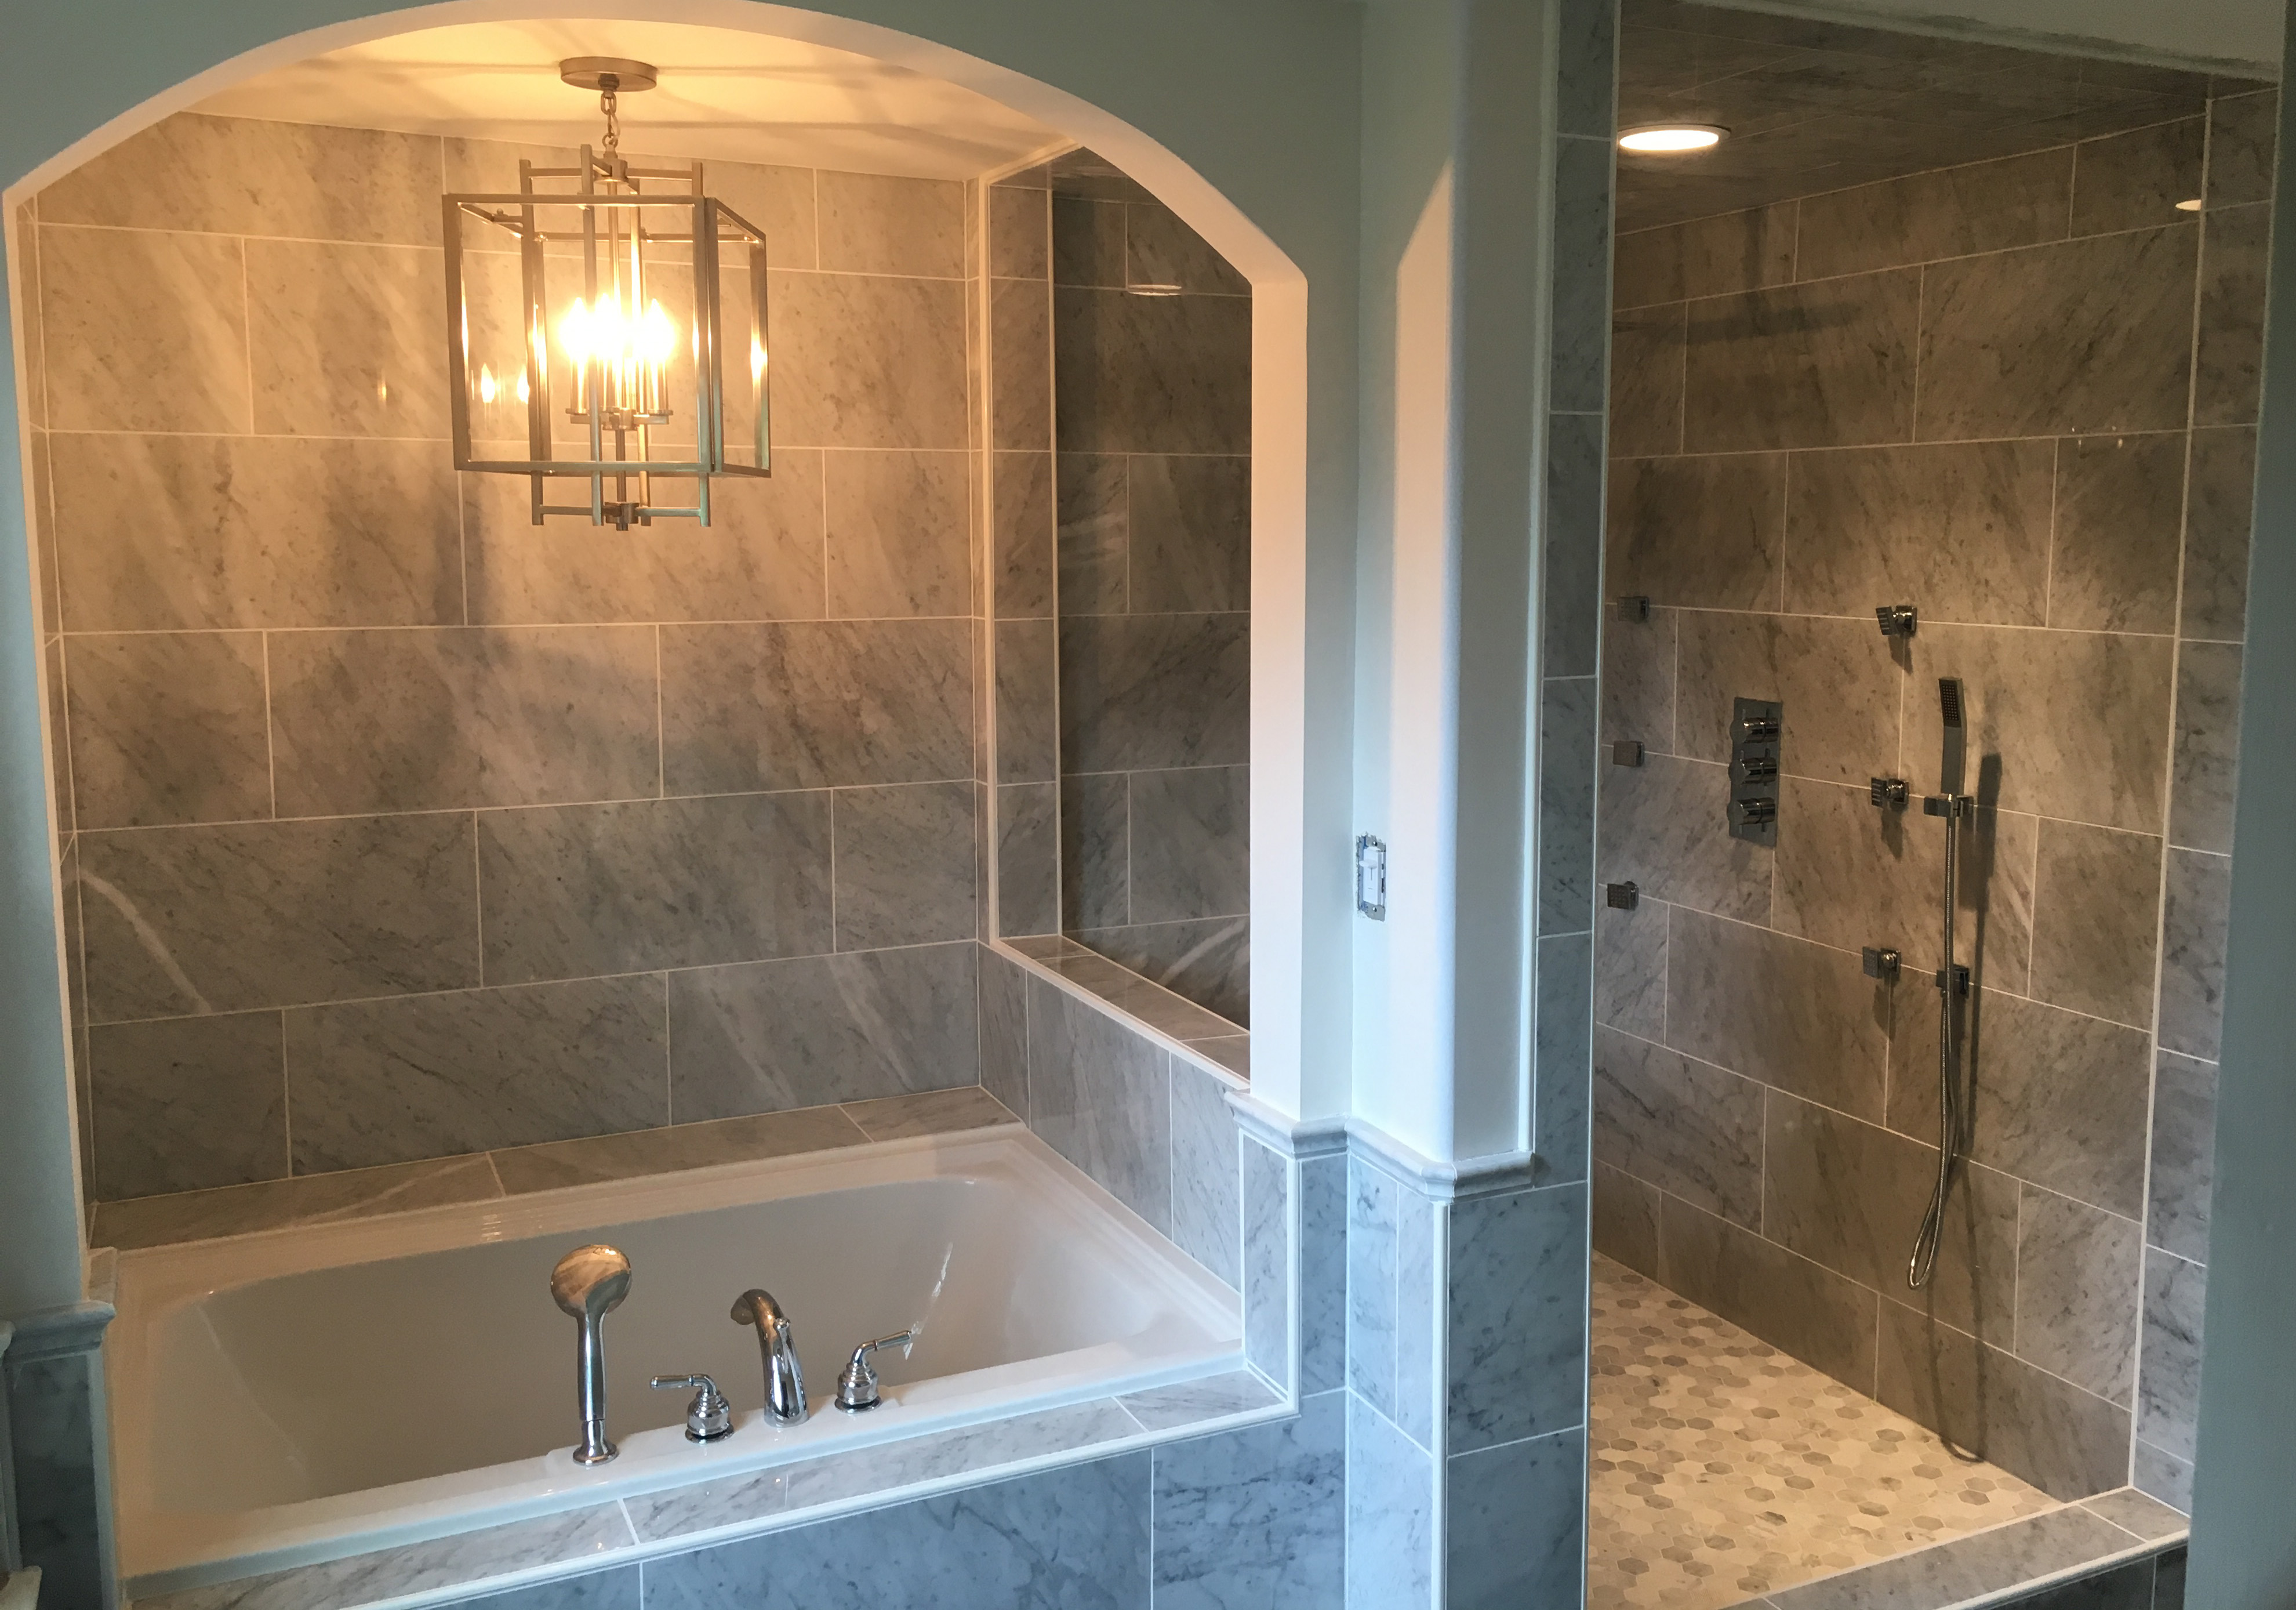
An adjacent closet was removed to make room for a large soaking tub and spacious tile shower. As my client began describing some of the design ideas she had and what tile she liked I started picturing something reminiscent of a Roman bath- with each area being a little separate and divided with pillars or columns. After she told me about wanting a chandelier above the tub, I thought an arched opening would really highlight the fixture and be a focal point of the room.
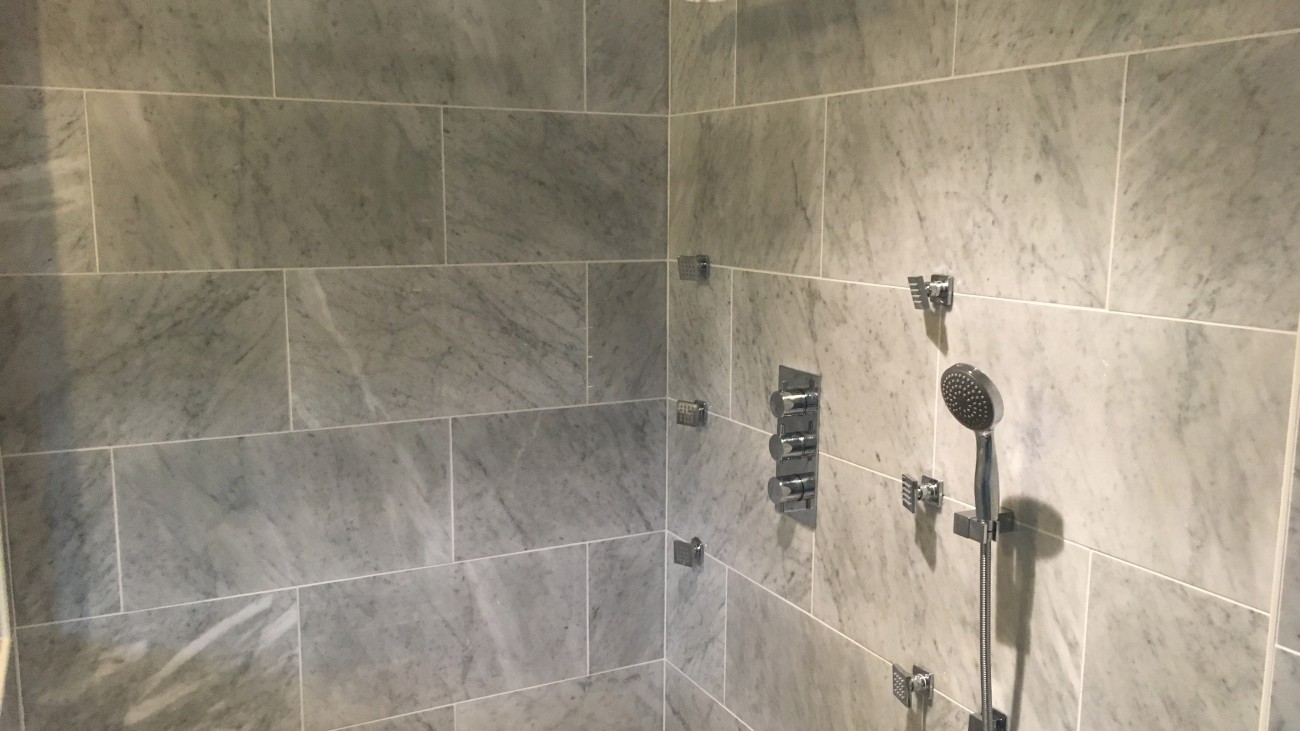
Most of the tile is Carrera Marble in the large 12″ x 24″ format. Truly beautiful stuff. I used a white metal trim to finish all the corners. It’s called Rondec from Schluter Systems and also comes in many other finishes. The white was perfect to match the grout and tie it all together.
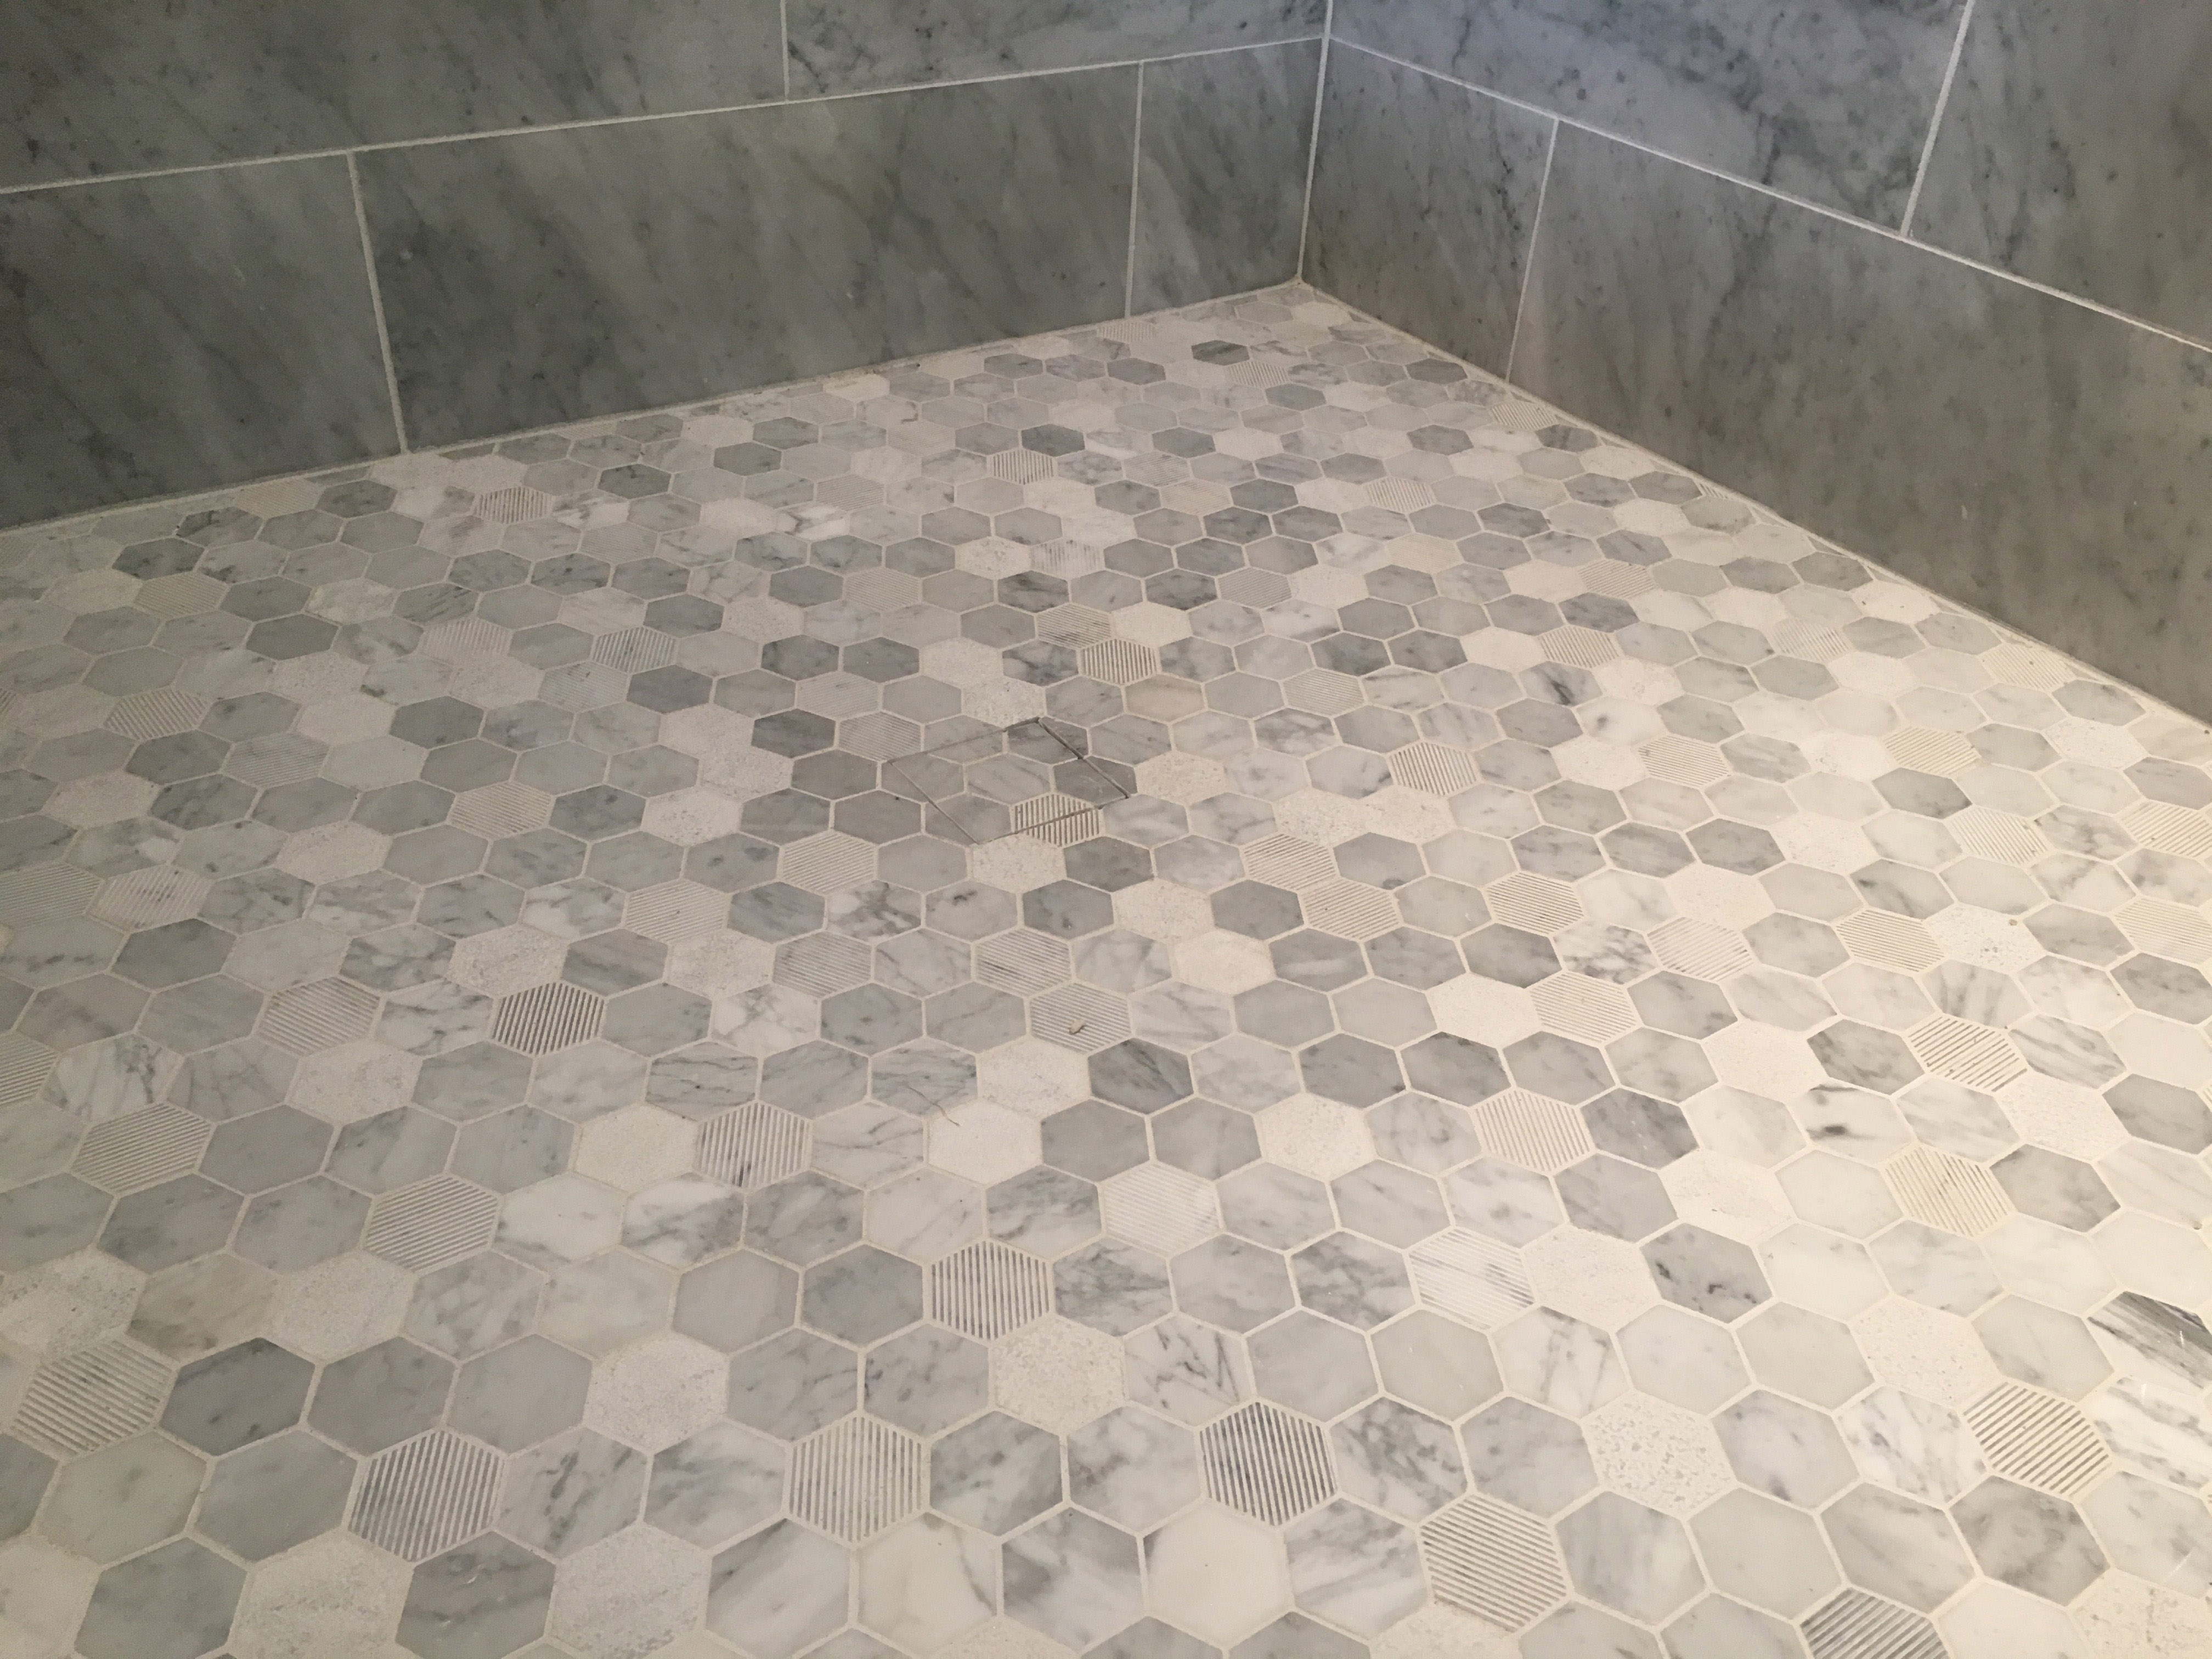 The shower floor tile is made up of 2″ marble hex tiles. These are a mixture of textures to keep the floor from being slippery. If you look closely at the picture, you may be able to see a square- that’s the drain! It’s a tileable drain, which means there is no metal grate to break up the pattern. I love it! This is also from Schluter, and is part of their Kerdi waterproofing system that I used throughout the shower to keep the water where it’s supposed to be..
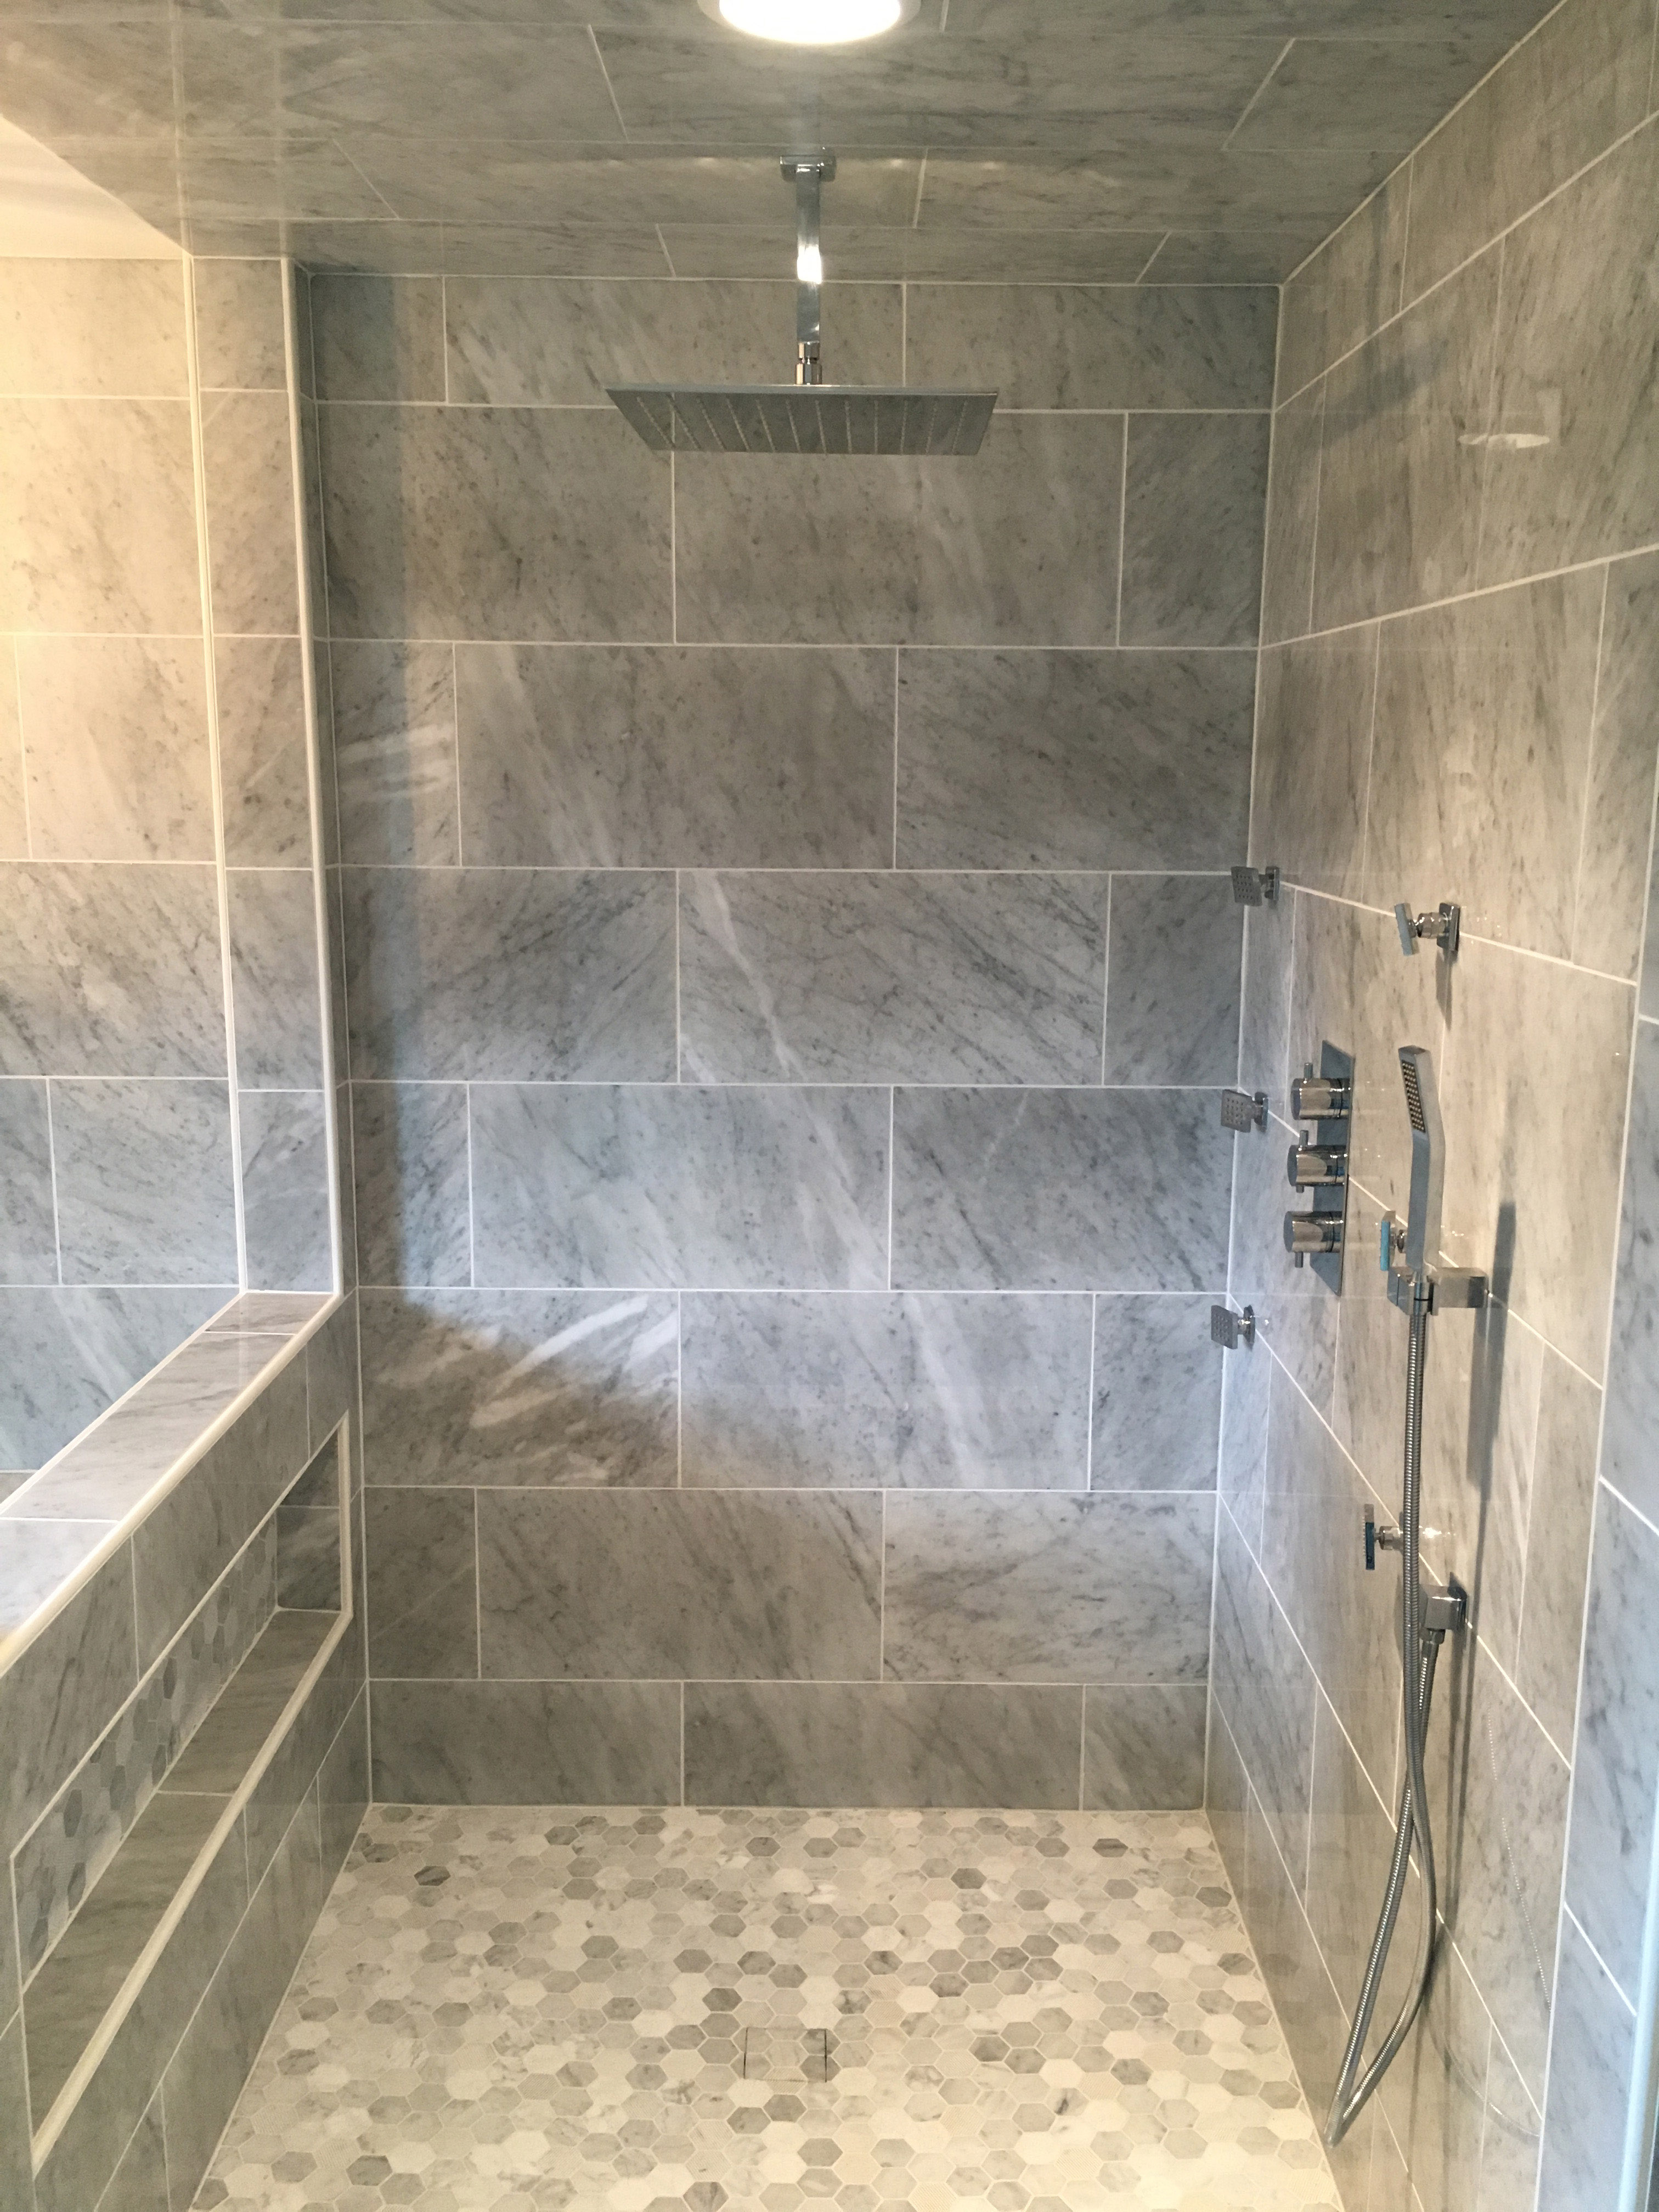
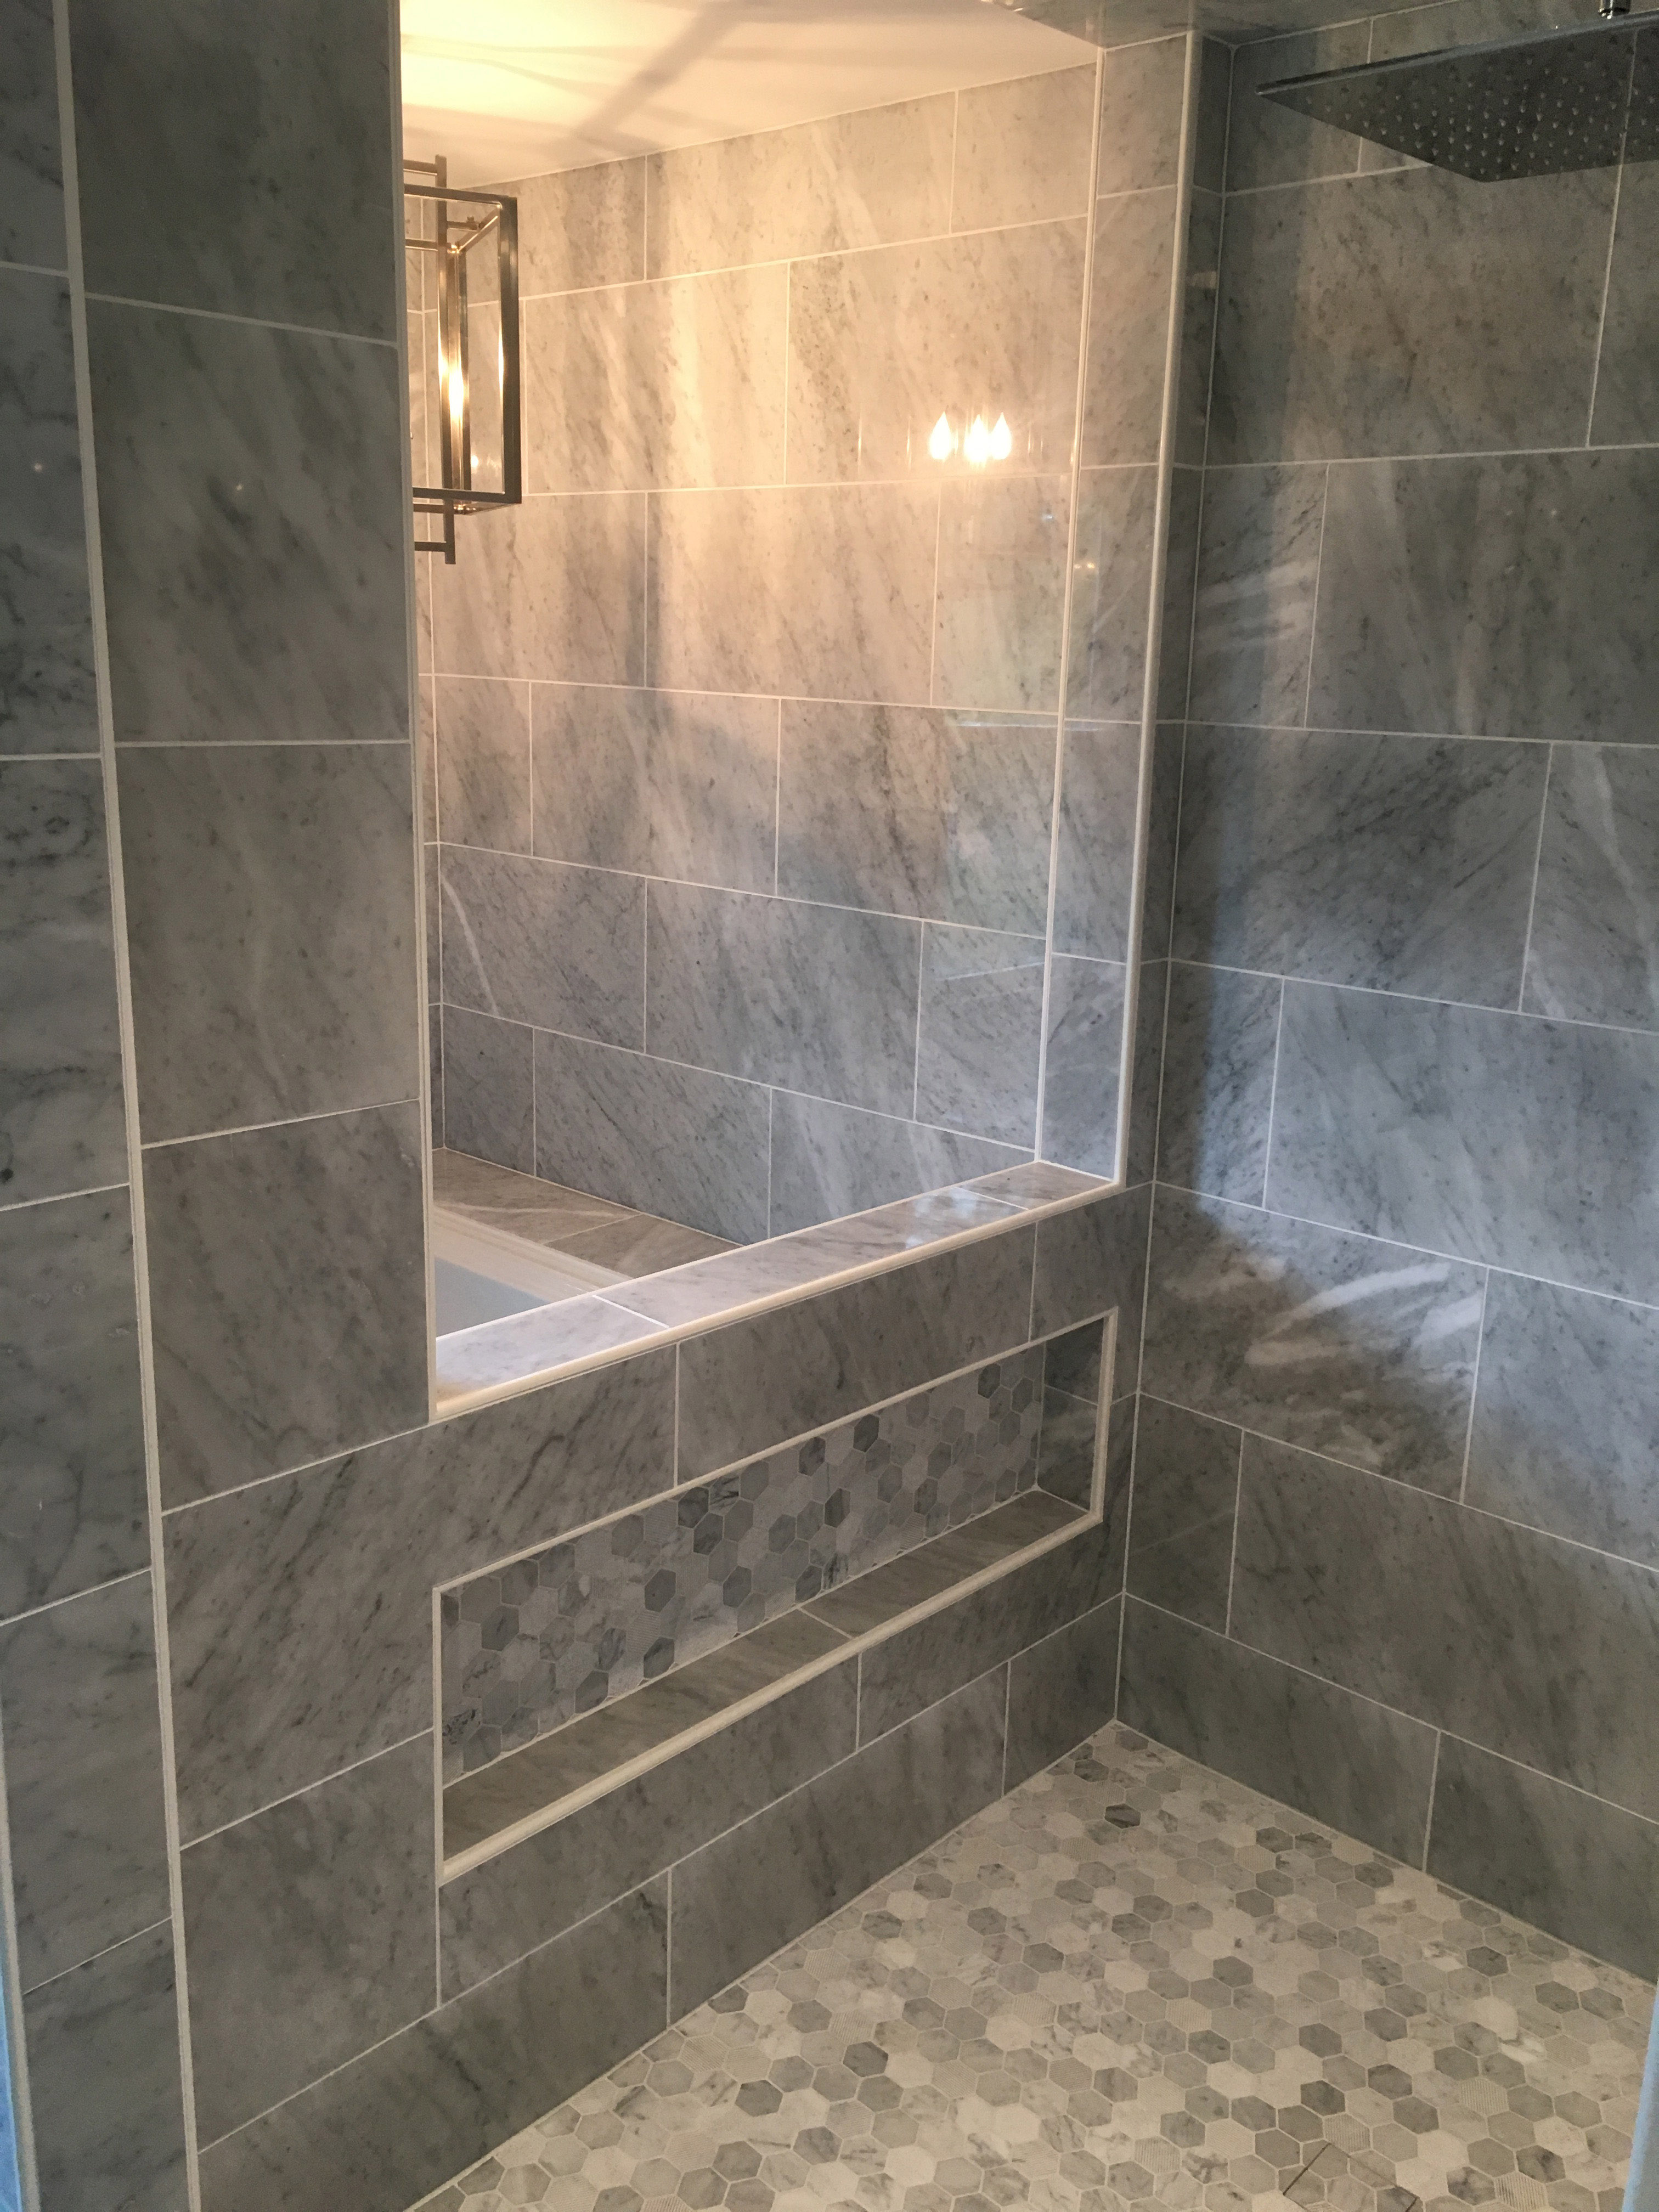 Doing the framing from scratch for the shower wall and tub, I had lots of options for designing a niche. We decided to make a really wide niche that would have plenty of space for storage, but it is somewhat hidden at this location and doesn’t feel like all the bottles and bars of soap are on display. The hex tile was used behind the niche as well. Turned out great.
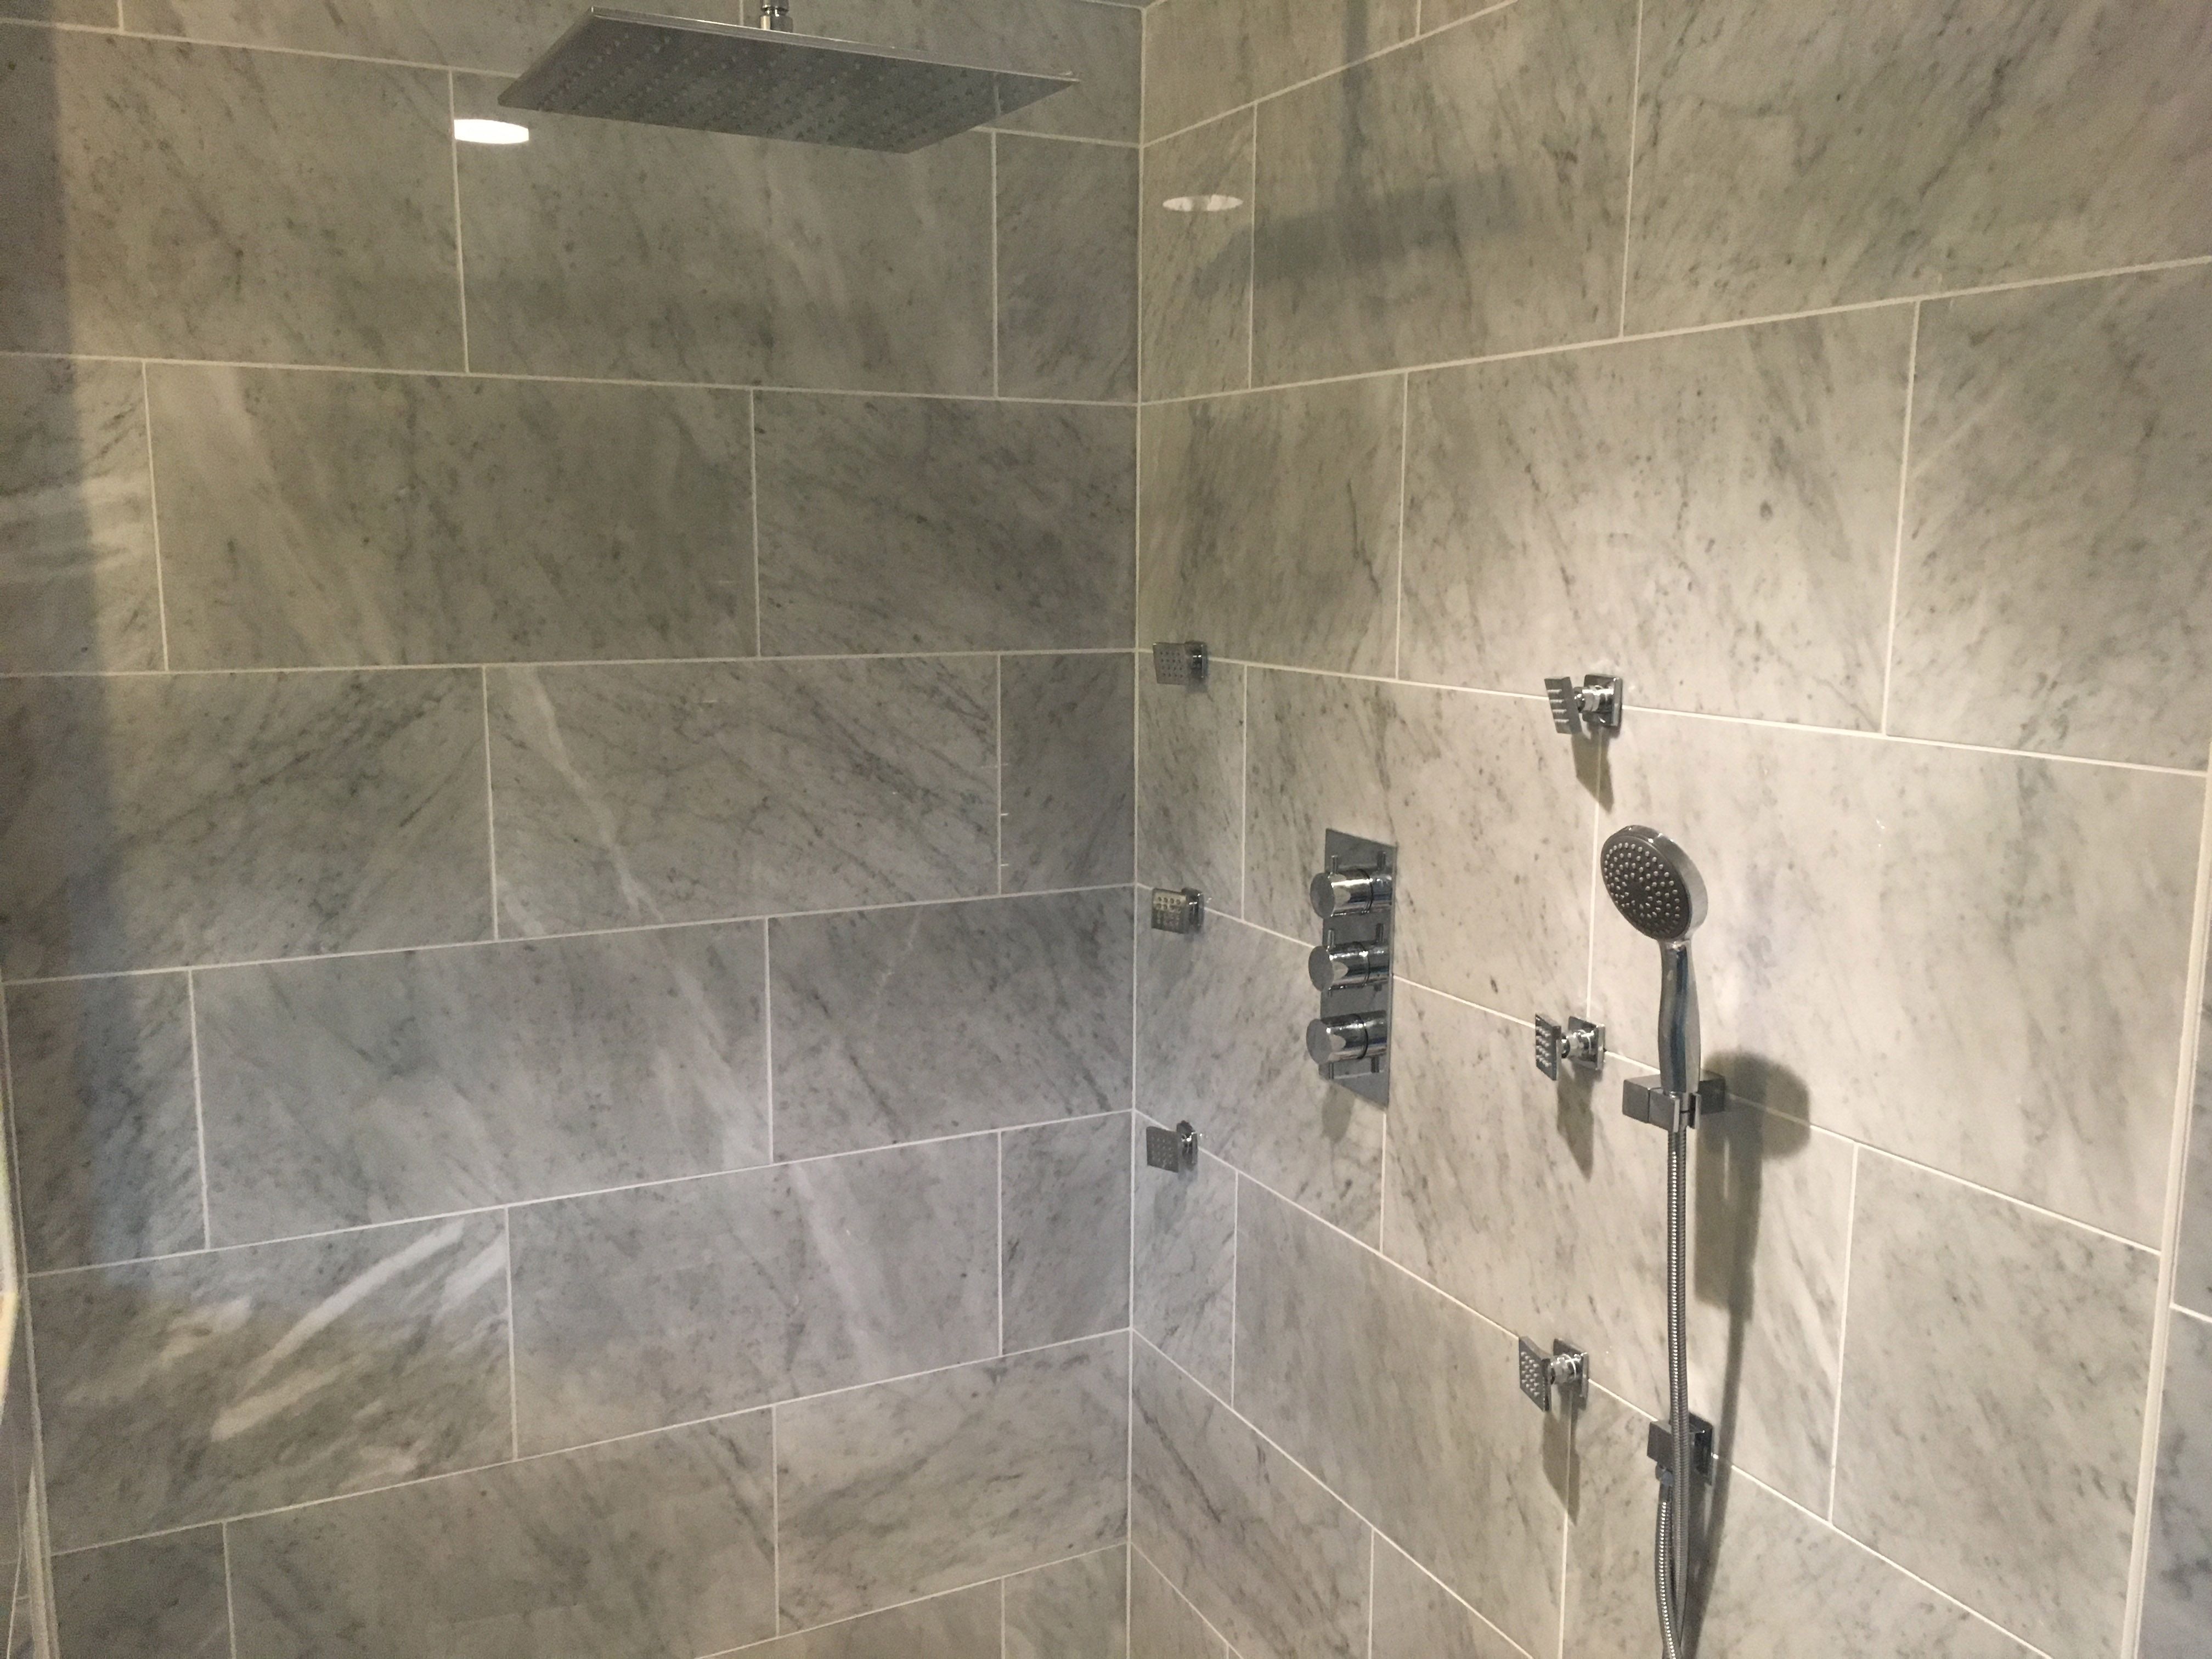 One interesting thing about this shower is that I tiled the ceiling! It also features 6 body sprays as well as a handheld and rainfall shower from the ceiling. There was a lot of planning that went into the shower to not only make sure it functions, but that the tile design flowed with the fixtures and wall dimensions as much as possible.
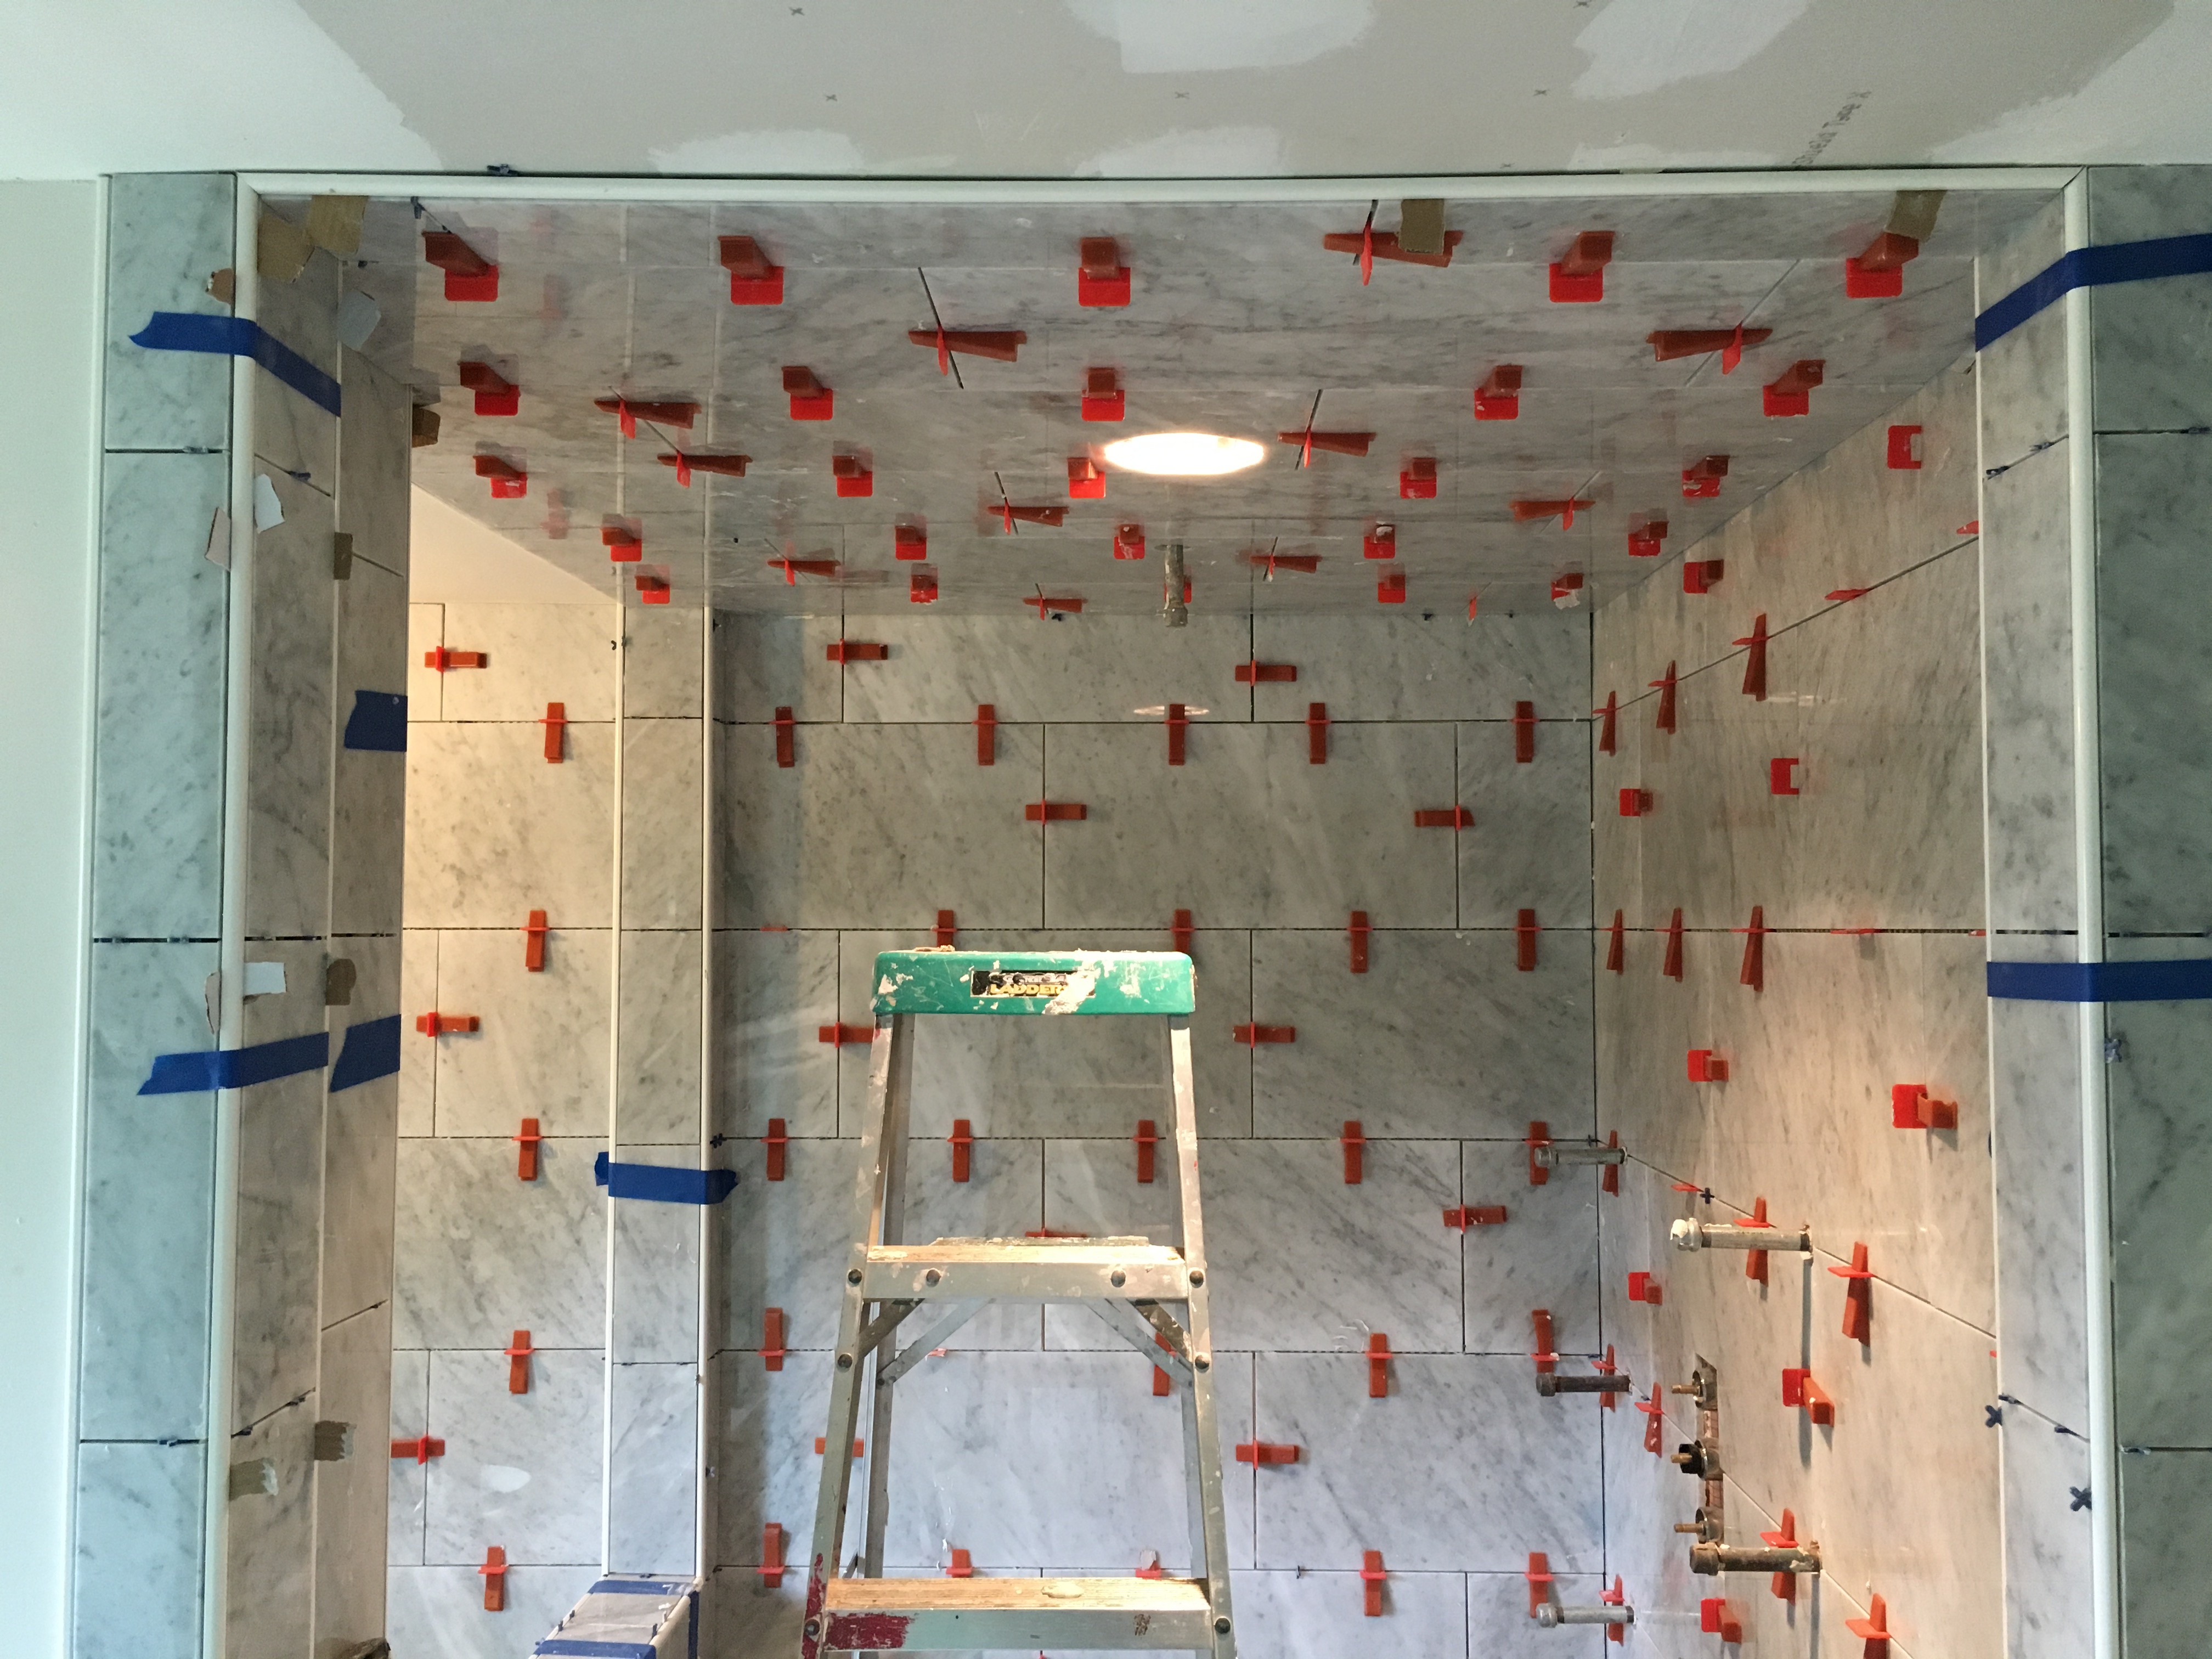 Here’s a picture from when I was installing the tile. All those red dots are leveling spacers from Raimondi. It’s a leveling system that not only spaces the tile correctly, but allows me to make sure each tile is flush to each other. It is especially useful with large format tiles and I’m growing to really love using it. You still have to watch for uneven walls, etc, but it is a great help to ensure an amazing finish.
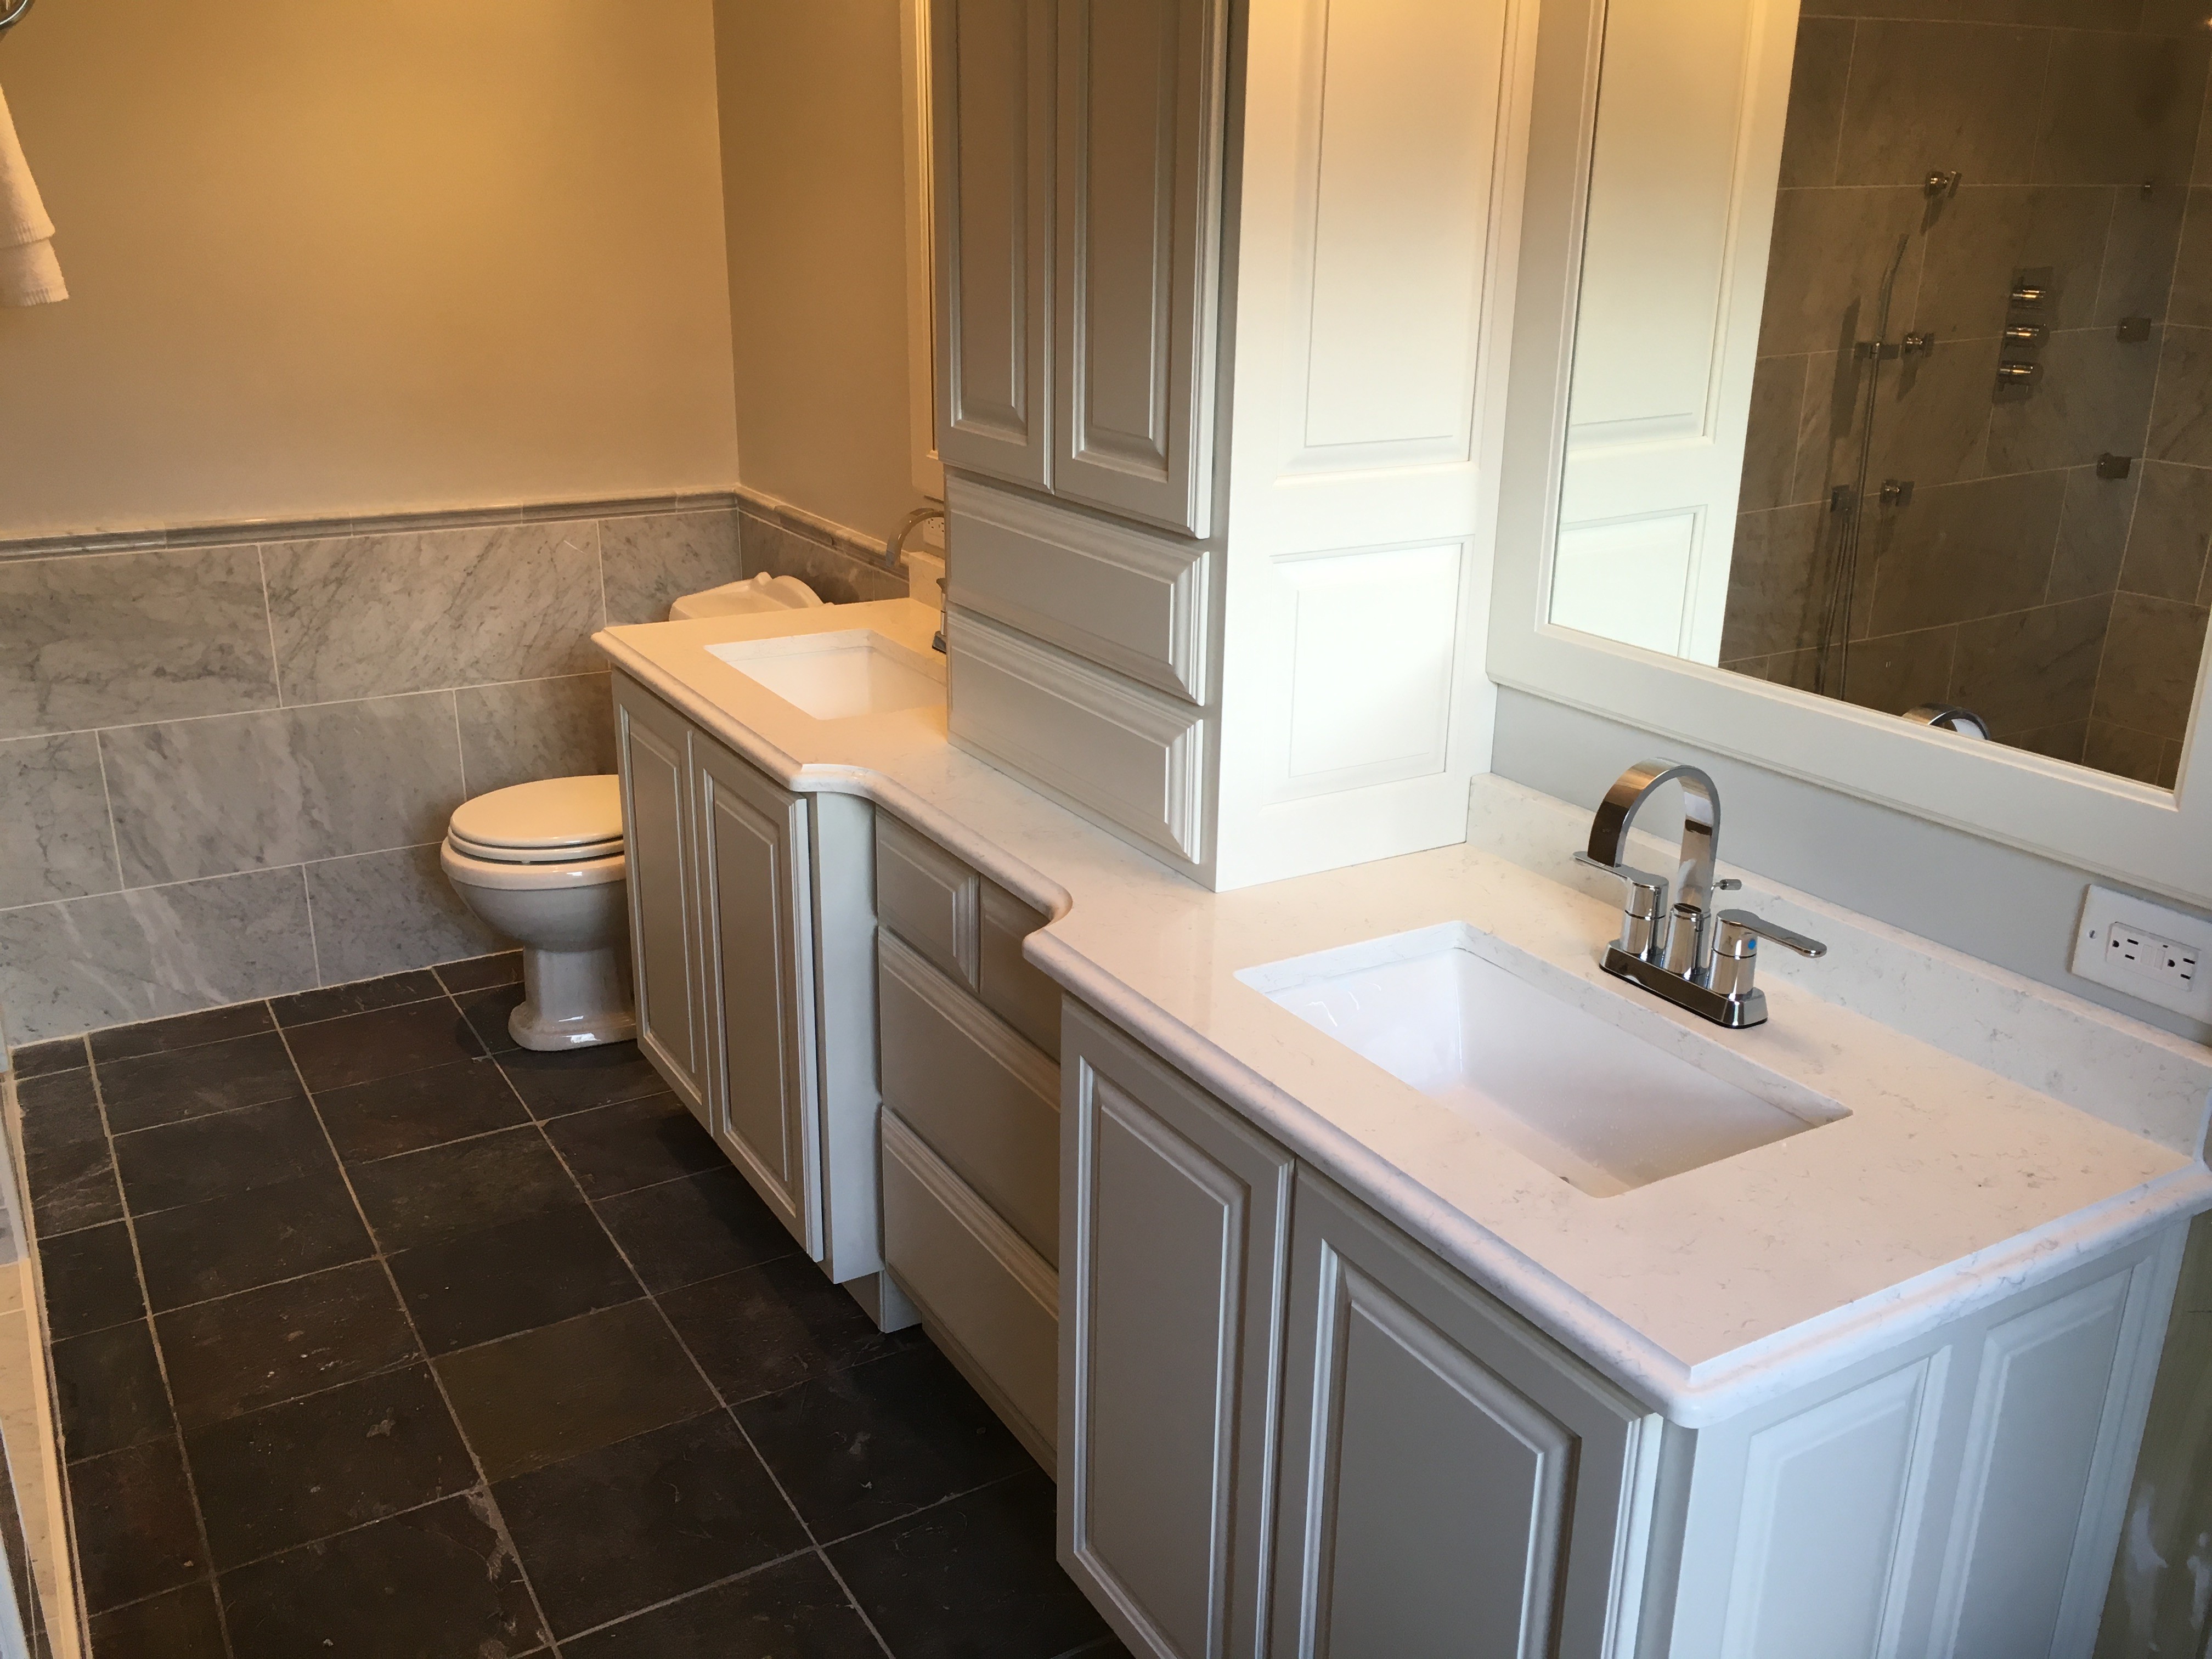
The bathroom is finished off with these beautiful cabinets featuring custom mirrors and double vanities. It is so fun to dream with clients about their vision for a new bathroom and then even more fun to see it come together. This project was one of my favorites yet!


