The Tudor inspired home that I’m currently renovating (see these posts) has several arched doorways with curved corners. I recently widened the doorway between the dining room and kitchen in this smaller home to open up the space and improve the traffic flow through the kitchen.
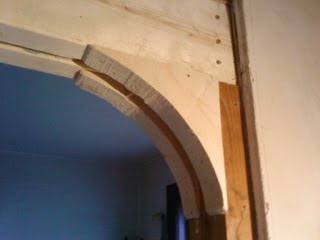
 Check out this post to see how I did the framing for the curved corners. Now it’s time to drywall those curves.
There are a few ways to approach hanging drywall on a curve like this. You could use very thin 1/4″ drywall that is somewhat flexible if your curve isn’t too sharp. I’ve even heard of wetting the drywall and letting it hang between a couple sawhorses to bend into a nice curve. I’m going to use a different approach.
First, I cut the piece to the right width and then marked on the back where the curve would be. Then, I made a series of cuts to score the back every inch or so. This allows the drywall to curve (and I didn’t have to get it wet.. :).

After the drywall is in place, it’s time to add a product called flexible corner bead. Normal corners have a rigid corner bead, but this one is meant to be bent around a corner. It works great, but you’ll likely have to add a lot of screws around the flexible edge that’s made up of a lot of small tabs. You want to make sure they are laying down flush with the wall and not sticking up where they’ll become a problem when you mud the corners.

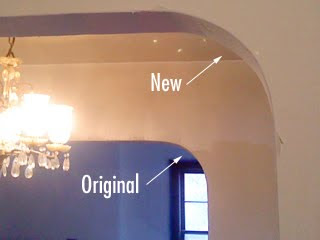
 In the background of this photo you can see the arched doorway into the living room that I was trying to match. Hopefully, future homeowners will just think it was always like this!
-Peter


