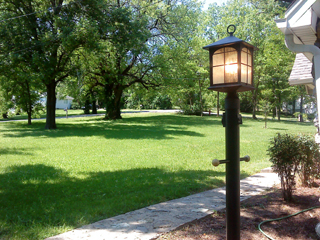
Want to add some light to your yard and character as well? How about a lamp post?
 Some clients of mine in Inglewood wanted me to install a lamp post that they had purchased to illuminate some stairs leading to a parking area at the side of their home. The light will help them not fall down the stairs, and look great in the daytime as well.
Installing a lamp post is actually fairly simple. The most complicated part is probably the wiring. It’s much like wiring any other light fixture. If that’s above your head, of course, call an electrician.
Here are the basic steps:
1. Find the perfect location for your new lamp post and dig a hole. Follow the recommended depth in the pole’s instructions, but mine was around 18″.
2. Put the post in the hole and fasten it to something so it will remain plumb while you do the concrete.
3. Figure out where you want the wire to go. In our case, we could go nearby into the home’s basement. I dug a small ditch and buried a 14-2 waterproof wire. (It’s the grey stuff). (If you’re lost, call an electrician…) Think before you dig so you don’t bust a water pipe or something.
4. Connect the wiring. In this case, the lamp actually has a sensor that will turn it on when it gets dark. I guess you wouldn’t have to even have a switch for this. Even still, I installed a switch near the front door so the homeowners could turn it off if they wanted to.
5. With the electrical done, let’s add some cement to that hole. Go get a bag or two of fast setting concrete that you can use to set posts without mixing. It’s great. You just pour the bag into into the hole, then slowly pour around a gallon of water on top and let it seep into the mix. Within approximately 40 minutes, the concrete will set up and you can remove the supports.
That’s about it. Expect to pay $100-150 for the post and fixture, and maybe another $25 if you don’t have a post-hole-digger.. 


