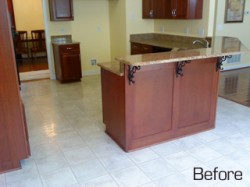
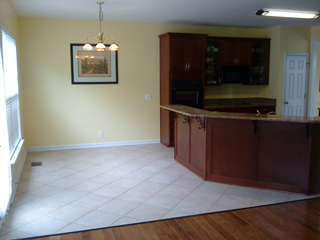
 After purchasing a new home in Brentwood, these homeowners decided to give the kitchen a face-lift. They had already upgraded to granite counters when I came in to tile the floor.
The original floor was vinyl. The new floor would consist of 16″ porcelain tile called Rialto Beige. To make it even more fun, I would be laying it diagonally and using Schluter RENO-U trim for the transitions to the hardwood flooring in the adjacent rooms. I thought it would be fun to cover some of the more interesting highlights from this project, starting with preparing the floor.
It may seem obvious, but the first step once the furniture and fridge are out of the way is to start removing trim.
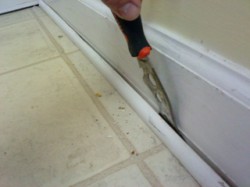 In order to reuse the pieces and not have to replace them I was careful to gently pry the shoe moulding off the baseboard with my painter’s tool after scoring the seam with my utility knife to break the paint. If you don’t get in a hurry, the trim can normally be removed with minimal damage. For this project, I left the baseboard alone and just removed the shoe moulding.
After the trim is off, pull the nails through from the back using a fancy nail puller or even just some simple pliers. This keeps the front of the trim looking nice with less holes to worry about later.
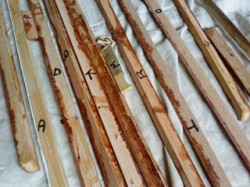 Here’s a step that will save you loads of time when you are removing trim: LABEL THE PIECES! Use a labeling system that will make sense to you later. I went through the alphabet and marked the back of the trim with a Sharpie as I went around the room. I can later re-install the trim in a snap.
Next, I was able to install 1/4″ Hardibacker cementboard throughout this large dining room/kitchen. The Hardibacker goes down over a layer of thinset spread with my 1/4″ notched trowel, and attached with a multitude of galvanized roofing nails. (I love my roofing nail gun…) I will later put 2″ mesh tape over the seams, but I like to do this as I’m laying the tile.
Yes, I installed the Hardibacker right over the vinyl. However, if I wanted to lay tile directly over the old floor, I would try to remove as much of the vinyl as possible, especially the top layer that is meant to be non-stick and easy to clean. Companies spend lots of money to make vinyl floors that won’t absorb stains which means it’s also not a good surface to attach tile. I like tiling over Hardibacker because it’s a stable foundation that won’t expand/contract the way that a plywood subfloor can.
Next, let’s lay some of that 16″ tile…

