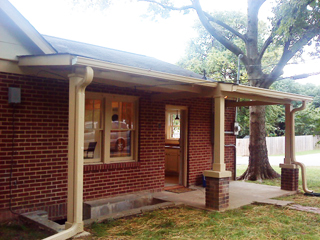
 One thing I love about living in “The South” are the porches. Not only do they add a welcoming feeling to a home, but they add outdoor living space protected from the rain. My summer house project in Inglewood had an old back porch that was about to fall down. I got to build a new one nearly twice the size and add in a little ‘old-house charm’ along the way.
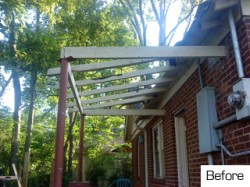 As far as the old porch went, much of the wooden structure was rotted and the two steel posts holding it up were not attached well and would probably just come off if they were bumped hard enough. Not good at all. The homeowner tore off the roof and left the basic frame for me to deal with as you see in the picture. I ended up using new 2×6 rafters and only keeping the basic headers to use again. They were attached through the brick on the house, so I left that alone.
As I said, we were building a much larger porch than the original. We wanted to do this so that the exterior stairs going to the basement would be covered and protected from rain. Until now, those stairs acted like a big funnel directing rainwater right into the basement. That’s not good either.
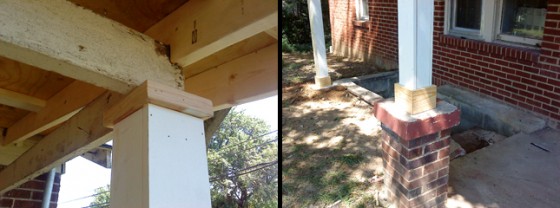
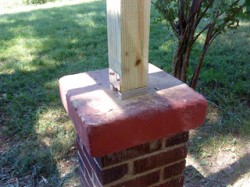 Anyway, the first step was to add some temporary supports and get rid of those old posts before they fell on my head. I drilled some holes into the old concrete pillars and attached a stand-off plate with a masonry wedge anchor. This will not only keep the post up off the concrete where it’s more likely to have water damage, but it is also an easy way to secure the post at the bottom.
In addition to the two posts set on the brick pillars, I installed a new post off to one side to help support the addition. There would be no stone pillar for this one. Instead it was set at least 18 inches into concrete.
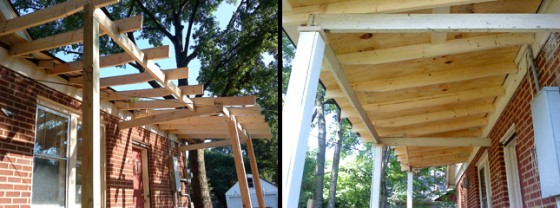
The roof framing was done in two sections, both using 2×6 rafters with a matching roof pitch. The addition was just set back a little bit from the main part of the porch. The homeowner wanted a fairly simple (read: inexpensive) porch so we would be leaving the rafters exposed on the inside with no ceiling to worry about. This is actually how the old porch was, so perhaps that’s historically accurate?? Maybe for this home it is.
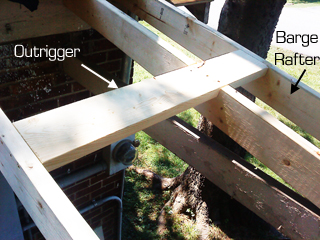 One characteristic of this home that I wanted to continue on the porch was the roof overhang. Like many homes, the roof sticks out 12 inches or more beyond the house. When framing, this can be tricky because there’s nothing at the bottom to support this final overhanging rafter, called a barge rafter. The solution is to support the barge rafter with an outrigger. As you can see in the picture, the outrigger extends from two rafters over through a notch in the adjacent rafter. This supports the end rafter much better than just nailing some blocks between the two rafters.
After framing and roofing the porch it was time to add some trim to the posts. I wanted to add some bulk to the 4×4 posts so I started by boxing them with 1×6 boards. I then added a cap using 1 1/2 inch boards that I ripped down from 2×4’s. The bottom got a base of 1×6 boards. It’s a simple trim treatment, but not unusual. It really finishes this simple porch well and matches some of the trimwork going on inside the home.

