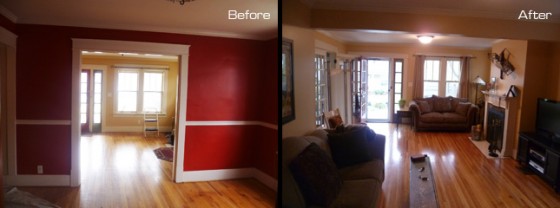
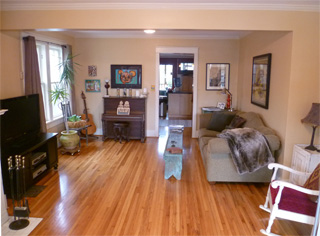
 If you’re looking for a way to really transform your living space, why not remove a wall? This amazing older home in the Lockeland Springs neighborhood of East Nashville has a lot going for it, however, the front couple of rooms were under-utilized and the homeowner wanted to combine them into one large living room, especially because she never used the formal dining room. She called me in to remove the wall and make it happen.
Before I began, the homeowner hired a structural engineer to analyze the situation and give us his recommendations on how to remove the wall and safely support the house. Removing the load-bearing wall will shift how the weight of the house is carried. Therefore, the first step was to replace a jack post in the basement with a heavier 3 1/2″ steel post that would rest on a new concrete footer. This single post would be carrying all the load from the new beam that I’ll be installing so it was important to get this right.
A steel post can actually be a little difficult to track down. The crank-up jack posts that the home stores have are not really meant to be a permanent solution to support the house. Instead, I had to get the post fabricated- custom made just for me. To get this done I called Metro Ready Mix in downtown Nashville. They’re known for concrete, of course, but they also provide lots of accessories for the job, like steel posts. I gave the specs from the engineer’s report and they made it for me and did a great job.
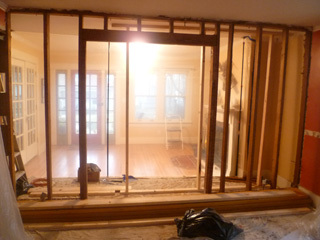 The messiest part of the job was to remove the plaster wall. It’s amazing how much plaster is contained on one wall! Yikes! Before I started that step I made sure to put up a plastic dust barrier using my new Zip-Wall poles. What a great tool!
After clearing out the plaster I was ready to get serious about removing the old wall. Remember- this is a load-bearing wall. I can’t just remove it without anything else to support the structure above. That would be a bad idea to say the least. A better idea is to build a couple temporary walls on either side of the wall while I remove the old framing and install the new beam. I built my temporary walls out of 2×4 legs with a 2×6 across the top. A larger board at the top helps prevent damage to the ceiling by spreading out the area that is supported by the temporary wall.
Here’s a helpful tip… think a project like this through very carefully. In my case, I needed to bring the boards for my beam in and lay them on the floor along the old wall before I built the temporary walls. Otherwise, I would have not had enough room to get those 14 foot pieces into place. That would have been a bit frustrating, eh?
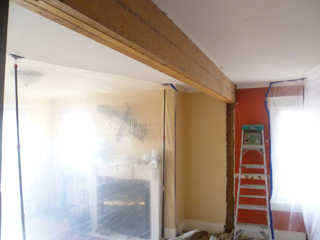 The new opening with the wall removed would be around 13 1/2 feet. That’s quite a span. To safely support the structure above without excessive deflection (or bounce) the engineer specified that I use a beam made up of three 1 3/4″ x 11 1/4″ LVLs, or Laminated Vaneer Lumber (also sometimes called MicroLam). These are man-made boards that consist of many layers of wood that is glued and pressed together. It’s much stronger than standard pine lumber.
I installed the beam one piece at a time. At the exterior wall side I made a pocket where the beam could slide in and be supported while I lifted the other end up into place, even using a jack post to help get it up that last inch. It took some work to get it installed, but it wasn’t long before the beam was doing its job and I could remove the temporary walls. Finally, I had some room to work and could really enjoy the change that had taken place.
I added some drywall and trim to finish up my part of the job, but there was one detail left to figure out- those holes in the hardwood floor where the old wall once stood. To fix this the homeowner called in R & S Flooring. I haven’t worked with them before, but I came back later to inspect their work and was quite amazed. The room looked amazing! They did a great job weaving in new flooring to patch the hardwoods and you can’t even tell where the wall used to be. I was impressed.
Oh, the difference a wall makes!

