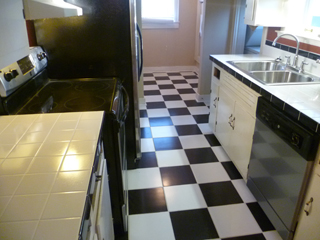
 Last week I got to help a client in Madison transform their kitchen. It was needed and they were excited about it. In addition to wanting a fresh look for their kitchen and laundry area, the old tile was loose and coming off in many locations. It was beginning to be unsafe!
The black and white checkerboard tile isn’t for everybody, but these clients loved the look of it which seemed to fit with the older style of their home as well. The kitchen is a fairly compact galley-style so there was just enough floor tile to be stunning and not overwhelming.
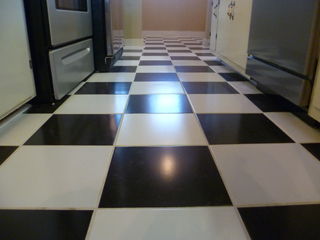 These particular tiles are just plain black and white 12″ glazed ceramic tile from Daltile. Not too fancy, yet they can be hard to track down. You want to make sure that both colors match perfectly since they’ll be mixed. If you combine brands you may find that the finish isn’t exactly the same or the sizes are slightly different which would be a nightmare for the installer.
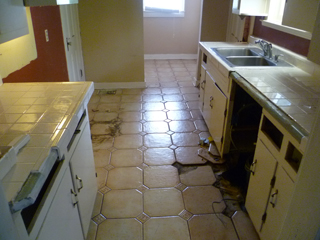 In this photo you can see the condition of the tile when I got there. I would say that most of the issues came from a poor previous installation. The floor tiles were way to easy to remove- they pretty much popped off in large pieces with a pry bar. This tells me that the adhesive they used, some sort of pre-mixed mastic perhaps, was not adequate. Once the tiles were up I removed the old cementboard in large sheets as well. Also, not exactly a good sign. When installed correctly, it usually comes up in chunks because it has to be broken up to get it out.
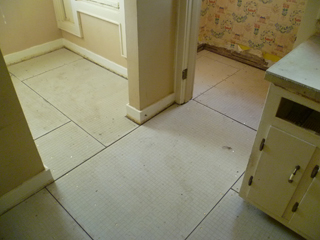 With the old floor gone I installed a new base of cementboard over a layer of thinset mortar. This mortar (which wasn’t used in the previous installation) helps to fill all the voids below the cementboard and give us a solid foundation to tile over. Voids can eventually lead to cracking of tile/grout, especially in high-traffic areas like a kitchen.
The homeowners also wanted me to extend the tile out to a small adjacent laundry room. The old flooring in this room had obviously suffered some water damage along the way and needed to go. I started removing it and didn’t reach anything solid until I hit joists.
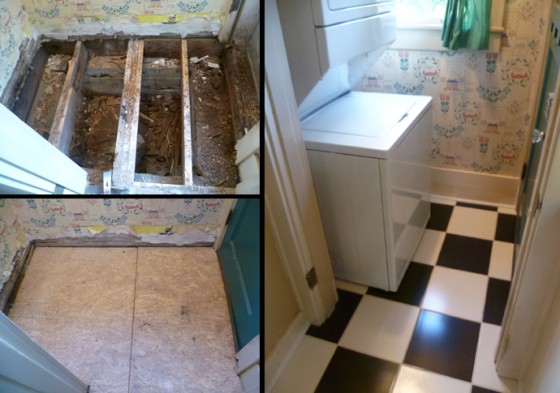
I added some extra nailers and then installed two layers of 3/4″ Home Advantage subflooring. After that, it also got 1/4″ Hardibacker over a layer of mortar. I was trying to match the floor height to that of the kitchen and was amazed that it came out perfectly. I was able to continue tiling into the laundry room without any transition at all.
I also built a new tile countertop, but I’ll cover that in my next post.

