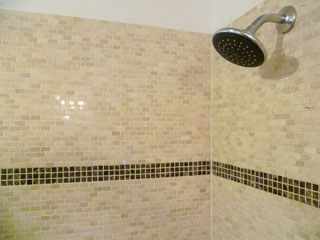
 When I was first planning this neo-angle corner shower in East Nashville it was to have fairly common 12″ tile on the walls with 2-4″ tile on the floor. This all changed when my clients called to say they were at a tile sale and found some cool tiny subway tile for the walls and some mosic tile for the floor. I knew this would be more work, but I love a challenge and I knew it would make for a remarkable shower. I was right on both counts, but it looks fantastic!
 Before I get to the tile, I had to waterproof the entire shower using the Kerdi waterproofing membrane from Schluter Systems. This is a great product that basically forms a waterproof barrier throughout the shower just under the tile. It directs all the water down the drain and ensures a leak-free system for managing the water in your shower. The trick with a shower like this is to make sure every inch is covered with Kerdi and it goes over the curb and around every corner.
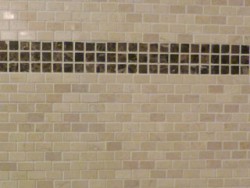 Next, I started with the wall tile. The 12″ tile sheets were made up of tiny stone subway tiles. Each tile was approximately 1/2″ by 1″. These are also called “mini-bricks” because they make the same pattern as a brick wall but they are miniature.
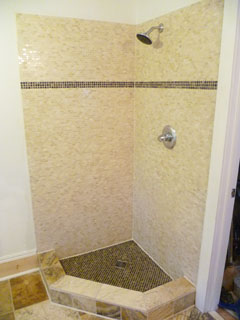 One tool that has been invaluable to me is my laser level/plumbline. With it, I can project a laser line on the wall and have a perfect reference point for the edges of the tile. If you don’t keep the layout square and plumb the grout lines on the tiles will be irregular and you’l have places where the tile ‘sheets’ start trailing toward or away from each other. It’s best to stay on top of this from the beginning and fix even the slightest deviation as you go along.
The floor tiles were even smaller, made of 1/2″ square stone mosaic tiles. I generally lay the floor tile after I’m done with the walls because I don’t want to stand on my new floor tiles when I’m laying the wall tile.
 With a neo-angle corner shower like this, I typically like to lay the tile on the diagonal to match the shower door. This can be tricky with larger tile and even more so with these tiny ones. The hardest part is dealing with any small pieces of tile along the edges. They will tend to come off of the mesh backing and need to be placed individually.
Laying tiny tiles is more work in several ways. First, it’s just more difficult to align the spacing. This is true for the tile sheets, but you also have to watch the individual tiles. There are often tiles that are attached the mesh backing that are off just a bit. These have to be peeled off the backing and aligned by hand. It also takes much more time to grout. I’ll admit, I underestimated the grout time for this shower. One box of unsanded grout is usually enough for a typical showers surround with 4″ tiles, but this one took twice that much and it only has two walls to grout! It just has a lot more grout lines to fill.
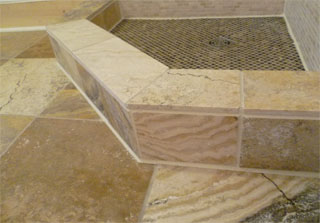 For this shower I did the curb last because it would be done with the larger tiles to match the floor. Cutting the angles can be tricky, but it’s really fun to see the finished shower start to take shape. After grouting everything, I use a grout-colored caulk to fill in all the gaps in the corners. I could grout these gaps, but they are the most likely to crack. The caulk allows a bit of flexibility and is perfectly matched to the grout.
This project won’t be done until after I install the shower head and the glass surround. I’ll cover that next time.

