 It seems this was the summer of tile showers for me. It was great! I got to build some large ones, some small ones and a couple in between. Each job is different with its own challenges and rewards. This particular project was part of a master bathroom renovation in Inglewood. These clients had an upstairs master bedroom with a small bathroom that was quite inadequate. They finally got fed up and started ripping out walls… that’s when they called me to help them put things back together.
They wanted to enlarge the small bath by moving a couple walls and incorporate it with the nearby master closet. All of this would be very open to the upstairs which was basically all part of the ‘master’ living space. I took care of the framing and had some help from plumber Dale Miller who did a great job getting all the plumbing straighted out.
Dale Miller is the guy at “No Crack Plumbing”. Their motto is “No crack plumbing… we wear overalls”. He did, in fact, have overalls on every time I saw him! Anyway, you can reach him at 615-569-1415 if you need a plumber.
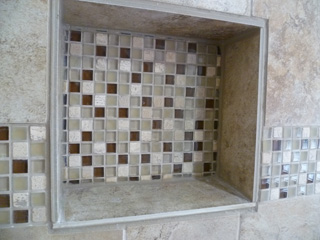
 As I was framing the walls for the shower the homeowner asked me about installing a small alcove shelf to hold her lotions and shampoos. She caught me just in time and I was able to include a small shelf in the design. There are several options for a shower shelf. One is to buy a ceramic shelf that sticks out from the wall, often in a corner. Another is to make the shelf built into the wall. With this type you can either fashion the shelf from scratch or purchase a shelf unit that is ready already waterproof and will bond with the Kerdi membrane.
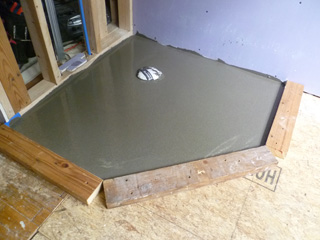 After framing the walls for the shower I needed to level the floor. I would later be using a Schluter foam preslope for the shower floor which had to be set on a level surface. To accomplish this I screwed some scrap wood around the perimiter of the angled corner shower. Then I poured self-leveling underlayment over the floor. This product seeks its own level and hardens quickly.
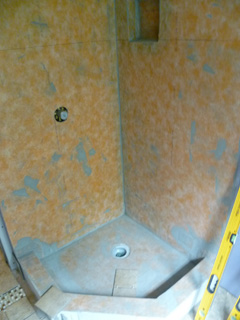 The floor went in followed by the Schluter Kerdi waterproofing membrane, which I use all the time. This product gives you a completely waterproof shower that can even be installed over drywall as I did in this case. The orange-colored membrane is mortared to the walls and overlapped in all the corners with mortar as well. The membrane bonds to the Kerdi drain which is a unique and integral part of the overal system for making sure the water actually ends up going down the drain.
This shower was designed with a 36″ glass enclosure in mind, but my clients wanted to add that later because of the expense. Still, it was important to have framing in the correct place to later attach the glass walls and the curb needed to be level so that everything fit correctly. For now they would be using a corner shower curtain unit and would install the glass enclosure at a later time.
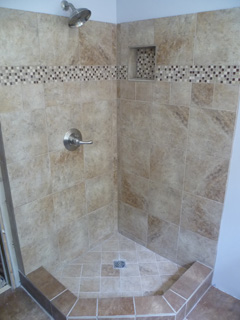
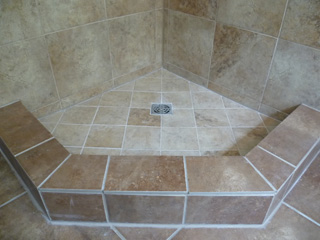 This was an example of a job where the tile design mostly came together at the last minute. The homeowner had purchased some tile that she liked and asked me how I could make it work as a shower design. The walls were mainly 12″ square tiles and floor was made up of matching 6″ tiles. I also included a row of the 6″ tiles just below the line of 1″ glass mosaic tiles that wrap around the walls. I was able to lay everything out so that the mosaic tiles were at the same height as the shelf and could line the back of the alcove. For the actual shelf I used a large piece of the 12″ tile. It all came together well and the glass tiles really add some color and spark to this shower.
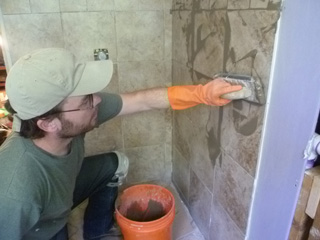 Here’s a photo of me grouting. I don’t usually make it into the photo’s because I’m the main photographer! Anyway, you can see that grouting can be a messy business. It’s always fun to see the colors of the tile come through as I start cleaning off the grout.

