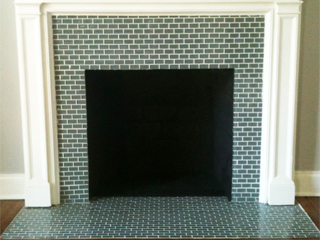
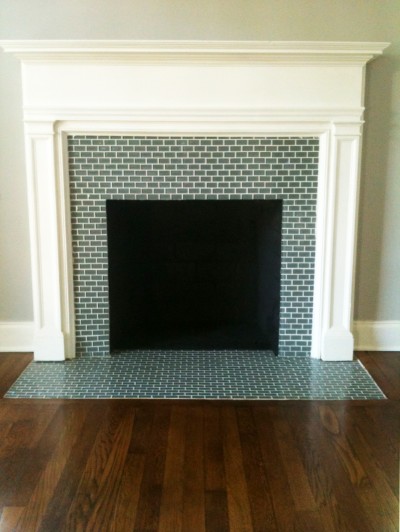
 I recently had the opportunity to tile this fireplace for an investor who was renovating the home. The rest of the home would be getting serious upgrades, including raising the roof to add an entire additional master suite. The fireplace needed a similar facelift and would get some small glass subway tiles to dress it up a bit.
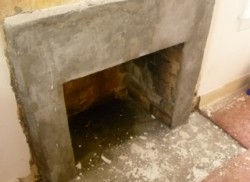
 I don’t have a great ‘before’ picture because by the time I got there the owner had put a thin coat of concrete resurfacer over the old masonry to give me a smooth surface to tile over. We wanted to refinish and reuse the old fireplace mantle, so the tile needed to fit with that as well. It was a bit of a challenge working with the old structure- it wasn’t quite perfectly symmetrical and needed some artistic work on my part to get it to look right.
 Overall, I’m thrilled with how it turned out.
These glass tiles are about 1″ x 2″ and come on 12″ x 12″ sheets in a offset, subway-tile pattern. The trick with any fireplace surround or hearth is to get the layout to look right. For example, it’s best to start the wall tile so that you end up with a line of whole tiles across the top of the fire box, centered appropriately.
Another consideration is that many of your edges are exposed, meaning that things need to be symmetrical and sized correctly for the tile you’ve chosen so that you don’t have a small cut of tile somewhere in the layout. It takes some thought beforehand and a couple tricks don’t hurt. (See tip below…)
Installation Tip
When you’re purchasing mosaic subway tiles like the 1″ x 2″ glass tiles fore this fireplace, see if they also sell sheets of 1″ x 1″. One sheet will probably be enough. Just consider this a bunch of tiles that are already cut in half for you. Use these along an edge rather than having to cut a tile and have an exposed raw edge. It was the perfect solution for along the insides of this surround. Just make sure the tiles are a perfect match. Sometimes, pretty close won’t do!


