 When installing a tile shower, it’s important to make sure the floor is sloped correctly toward the drain with no spots that will encourage pooling or standing water. Often, I will used a pre-formed shower floor that is part of the Kerdi waterproofing system. It’s easy to cut and install and already sloped at the right angle. However, sometimes I’ll need to sloped the floor without such a handy product and actually do it the ‘old-fashioned’ way. Here are the basics on how I do that.
(Even if I’m building the floor with mortar, I use the Kerdi waterproofing system and Kerdi drain keep the water where it belongs. The drain needs to be already set before I start building the floor.)
The required slope for a shower floor is 1/4″ per foot. To begin I measure from the drain to the farthest point away in the shower and multiply times 1/4″. For example, if it’s four feet to the furthest corner, the floor should be an inch higher in the corner than it is at the drain to facilitate a correctly draining shower floor. So, I make a mark in the corner at this level and draw a level line all the way around the shower at this height. (A laser level is extremely helpful for this).
Note: If your shower is not square with the drain perfectly centered, some areas will have a steeper slope than others. This is fine. The key is that it’s at least 1/4″ per foot, which is why we use the furthest distance as our starting point.
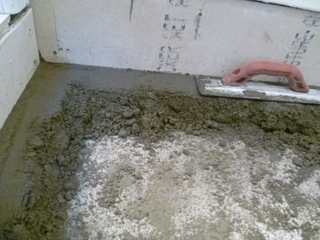
The perimeter line tells us the floor height at the edges and it will be level all the way around, making our tile cuts easier. Now all we have to do is fill from the edge to the drain with an adequate underlayment for tile.
MUD
I’m not necessarily a ‘mud man’ when it comes to tile. In the past, all tile was installed over some sort of mud bed, which was basically a cement slab over lath. Now, we have other products to save us this laborious process. Still, for a custom sloped shower floor, you need mud.
The mud is generally portland cement mixed with sand. Sand is the key. I know guys who buy the components and mix it themselves, but I take the easy route and purchase a bagged product called ‘Sand Topping Mix’. It just needs water and it’s ready to go. It doesn’t take much water, though, as you still want it to be fairly sandy and ‘fluffy’ rather than sloppy or runny.
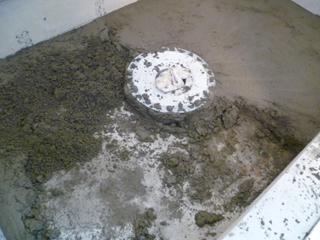
 The floor begins by packing the mud around the edges like a thin ledge that matches your level line. Depending on the size of the shower, I generally do one end at a time as I’m backing out through the shower door. After getting the mortar packed around the walls, I fill in the middle and use a couple cement trowels or even a 2×4 cut to the right length to get it to slope gradually from the ledge to the drain. Make sure you pack mud under the edges of the drain as well so that it is supported adequately.
 There’s no rush with this process so take the time to get our a couple levels and check your work. I have a short torpedo level that I used to check small areas to make sure every little spot is sloped correctly. I also use my longer levels to make sure the perimiter is level and the floor slopes to the drain with no humps that might collect water. Just remember to wipe of your level if you get mud on it.
The result of this process should be a solid shower floor that is ready to tile. I normally come back the next day to complete the waterproofing and start laying out tile.


