 There are many benefits to planning ahead for your tile projects, especially when you are building a new home like this one near Worthington, Indiana (in Greene County, 40 min west of Bloomington). Not only can you plan things like recessed storage niches for shampoo bottles or multiple showerheads, but you could go custom and design a ‘curbless‘ tile shower.
 The curb is the ledge that goes across the front of the shower and holds the water in on the floor. A curbless shower, of course, doesn’t have this curb. Removing the curb isn’t complicated, but it means that the drain has to be ‘sunken’ into the floor so that the shower floor can be sloped correctly for the water to drain. This is the part that you must plan ahead for. However, for people concerned about accessibility issues, a curbless shower provides barrier free access, making it a practical necessity, especially as we age and grow with our homes. And, it’s just plain cool!
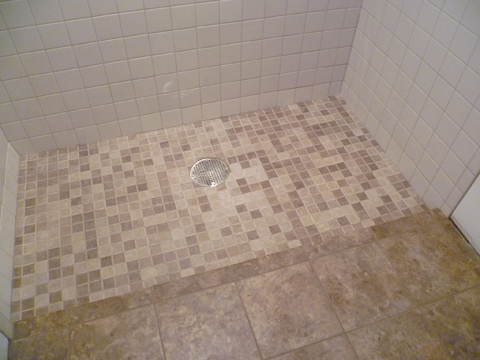
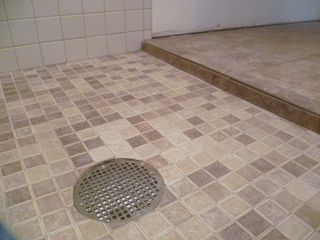
I’m not sure this shower qualifies as completely curbless, but they did sink the shower floor when they pour the cement slab for the home. There is a small 1 1/2″ step into the shower, but no large curb to climb over to get into it. I was not involved when the construction was completed. My job was to tile the shower.
 Even though the floor was a concrete slab with an integrated drain, I went ahead and covered it all with the Kerdi waterproofing membrane. This will funnel all the moisture down to the drain where it belongs and protect the walls from any moisture penetration.
 After waterproofing the shower, I installed the tile floor. I often prefer to install the tile on the floor first because the wall tiles will nicely cover all the edges, especially when the floor is a mosaic or smaller tiles that may be more difficult to cut precisely when the pieces are smaller. With the floor in place overnight, I covered it with brown construction paper (to keep it clean from mortar) and started on the wall tile.
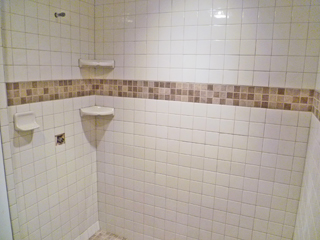
 The walls received the somewhat timeless 4 1/4″ square glazed tiles that have been popular for decades. This is a biscuit color which is an off-white shade that would blend well with the brown and beige colors in the floor tiles. I was able to get a couple matching corner shelves and install them along with a matching soap dish. The client was trying to eliminate those plastic-coated wire shelves that tend to start rusting and don’t look as nice, especially in a beautiful new tile shower, right? The mosaic stripe was made using a 6″ strip of the floor tile.
The other feature that makes this shower feel so large is that I tiled all the way to the ceiling. I actually needed a ladder to finish the job. Not only does this look great, but it protects the upper walls from shower spray and moisture that I often hear people complaining about.
A glass surround will be installed later, but this bathroom is already taking shape, completing this wonderful home.


