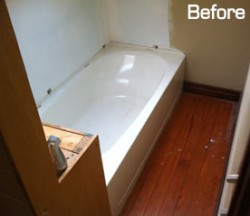
 I’m always interested in a challenge… seriously, I like to take an unusual situation and help a stumped client figure out a solution to it. That was the case with this tile shower. When I first saw this small corner of a larger upstairs bathroom in Greene County, Indiana it had a tub that had never been finished up. The homeowner didn’t like the tub at all and wanted to just turn the entire ‘bathing room’ into a new tiled shower.
NOT TYPICAL
The difficulty was that the ceiling over most of the room was angled against the roof-line and made it impossible to stand up in half of room. I wouldn’t normally recommend turning such a room into a shower, however, the homeowner didn’t care. It was all that he had in the upstairs of the home and he was completely happy to get a teak bench so that he could sit and shower with a handheld fixture. So that was the plan!
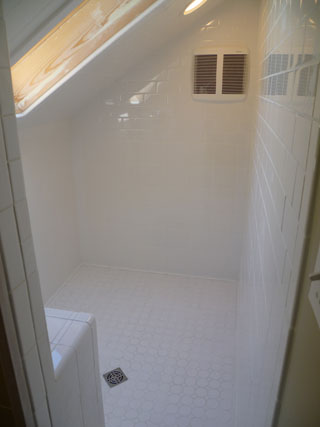 Though the ceiling was lower, this shower had all the making of a grand installation. We went with simple white tile that would fit the decor of the older lodge-style home in the hills outside of Worthington. The homeowner gave me some design freedom and I decided to mix several styles of white tile. It may not be the least expensive tile out there, but I love how many trim pieces are easily available to make all the corners and edges look fantastic.
I started by ripping out the tub and moving the drain a few inches to get it as near the center as I could. I took some time to install a new bath exhaust fan and recessed light in the dark end of the shower (both approved for shower usage). Then I patched the subfloor and built the large sloped-floor using sand-topping-mix, which is a mortar product consisting of Portland cement and lots of sand.
If you don’t mix the floor mortar too ‘wet’ it is fairly easy to work with and shape. The goal is to have at least 1/4″ of drop per foot from any point in the shower. I like to start from the furthest point to get this measurement and then level the perimeter of the floor all the way around. Some areas will actually have a steeper fall, but it looks better than having the first row of tile all cut to noticeably different heights.
I waterproofed everything, including the ceiling with Kerdi waterproofing membrane. In such a small shower there would be a lot of steam. The waterproofing on the ceiling would keep it confined to the shower. The fan will also help to pull the steam through the roof to the outside.
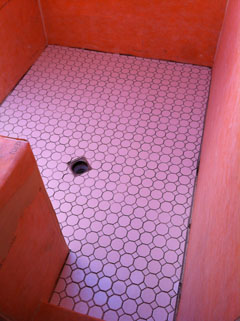 With the mechanics of plumbing, electrical and waterproofing finished, it was finally time to lay out the tile. I used 2″ hex tiles on the floor mixed with 1″ squares. It’s a classy look and can be found at Lowe’s for under $3 a square foot. For something more unique you could easily double this price for the floor tile. I like to put the floor down first so that the wall tiles will cover the rough edges around the walls. This makes cutting the mosaic much easier than doing after the wall tile is already installed. I let the floor set overnight and then cover it with heavy construction paper so I don’t drip mortar onto it while I’m laying the rest of the tile.
START WITH THE TRIM PEICES
When using fancy trim pieces to trim out a shower, I start with those for the layout. You want these to be full pieces if possible with a full or at least larger piece of field tile next to it.
I took lots of measurements and tried to imagine how things would end up if I started with different positions of trim tiles or at different heights. I wanted to have large pieces of tiles at the bottom and top of the layout, and whole tiles wherever possible. Once you’ve decided on the first few pieces, everything else is pretty much decided from there. It’s hard to change after get going so it helps to think everything through to the end, as Mr. Stephen Covey likes to remind us. (“Begin with the end in sight.”)
 MY NON-ACEDEMIC TILE DESIGN ‘THEORY’
I generally like to start with larger tiles near the bottom and use smaller as you go up. There is probably a design theory name for this, but it feels right and gives balance. If you stacked blocks, you’d normally place the bigger ones at the bottom, etc.
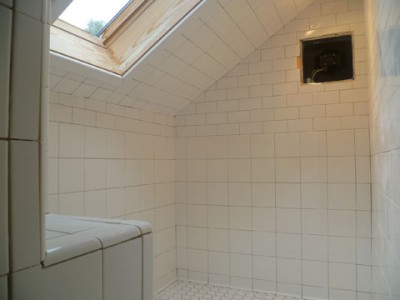
The photo (right) was taken before I grouted and shows the different tiles used in the layout. It all blends together once the white grout is installed.
I used 6″ x 6″ squares for the bottom half of the walls, which I thought would be perfect because they would line up well with the 6″ bullnose edge pieces, as well as the 3″ x 6″ subway tiles that would go above. They would all line up and make things feel comfortable. When the grout lines don’t line up it can be a little awkward, at least if you’re a tile guy!
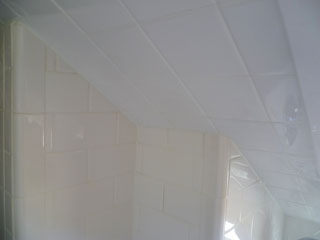 The ceiling was sloped like the roof so no tile would match the grout lines at the exact angle. Instead of trying to make it match, I just used an entirely different 4″ x 4″ square tile on the ceiling. Since it wasn’t supposed to match, I could do a completely separate layout for the ceiling and could even start with whole tiles at the top. The tiles at the bottom were still decent size and it was easier to lay a full tile in the small space where the wall met the ceiling.
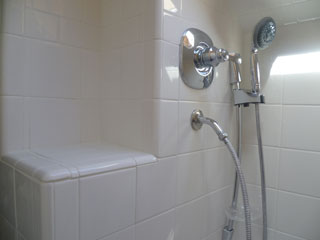 The small shelf was what remained of the bump-out that held the old bath plumbing. I extended part of it to the ceiling so that the new valve could be higher where it was more comfortable to use and there would be a spot for the rail where the hand-held shower hung. The shelf will be a great spot for shampoo bottles and soap. Like the floor, it is slightly sloped toward the drain so that water won’t pool there.
Yes, that is a skylight in the shower. It will not only let in some much-needed light, but it also gives you another place where you can actually stand up in this shower. The skylight itself will have to be kept painted and caulked to prevent moisture damage to it, however, the casing I used for trim is vinyl moulding that won’t rot, even in a shower!
It was an unusual project, but I enjoyed seeing it come together. The client liked it too as you can read below!
TESTIMONIAL
The quality of Peter’s work surpassed all of my expectations, he is a true craftsman. Professional approach, timely execution and the result of his craftsmanship entitle Peter Bales to the utmost of my respect and thanks. Inspired Remodeling & Tile has earned my trust and will be the first call I place going forward. – Larry M., Bloomfield, IN

