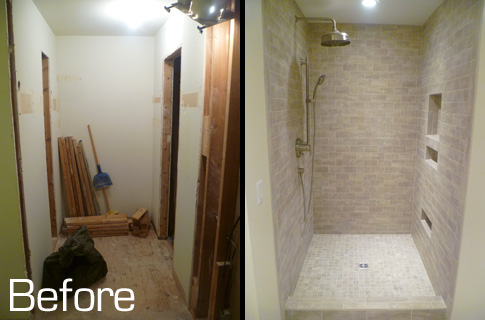
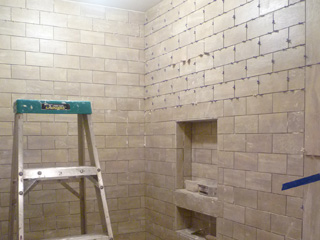
 I often talk about how important it is to consider what’s going under the tile, especially in a shower. There is much to consider and it’s best to do it as early in the process as possible. For this project in Bloomington, IN, I was starting from scratch, turning a closet into a new master shower as you can see below, or at this post. Here are some of the things that I take into consideration before I ever pick up any mortar.
The first question is how big to make the shower. This is usually decided by the client- or the walls! Sometimes, I’ll size the shower to match the tile that I’m using. With 3×6 subway tile, it’s good if everything is a multiple of 3” plus the bullnose tiles around the perimeter. The size may also predict where the drain and fixtures go. This shower was almost a perfect 48” square, which meant that I wanted the drain centered at 24”. Thankfully there wasn’t a floor joist in the way. If that’s the case we may change the plan a little and offset the drain if needed. Improvisation is important, but best if it’s known in advance.
Waterproofing
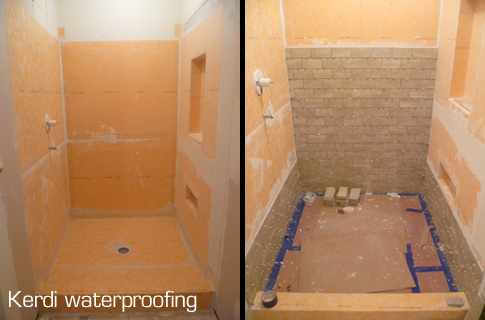
One aspect that trumps everything else is how will the shower be waterproofed? I use the Schluter Kerdi waterproofing systems for all of my shower projects. Instead of just the floor being waterproofed, the membrane extends up the walls to the shower head making the entire space waterproof and practically vapor-proof as well. It’s so good that the company recommends installing it over drywall.
It’s also easy to use the Kerdi membrane to waterproof niches or benches. I can cut it to any size and make sure that those beautiful recessed shelves don’t collect water and leak into the wall! After the Kerdi is applied to the walls using thinset mortar I can tile right over it as you see below. If any water gets through the grout, and it will, the membrane will send it right down the drain. No weep holes involved.
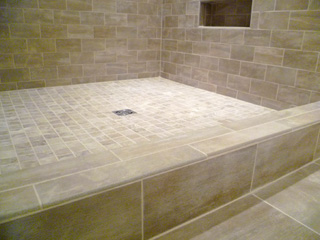
When figuring the size it’s important to consider the curb size. For example, in this shower, the curb would be 4 ½” wide, a standard size. To make the shower floor a perfect square means that the curb will set with the inside placed at 48”. This means that the tiles on the walls will actually extend to close to 52” with the curb added in.
Is your head spinning, yet?
The main thing is that you consider the curb when centering the drain. Often if a plumber has already centered the drain before I arrive, he hasn’t thought about the curb and now the drain won’t be centered on the floor anymore after I put the curb down. Okay. Enough about that…
For this project, a plumber came in and roughed in the plumbing. Then, I added another layer of 3/4″ subflooring throughout and framed the shower and niche. It’s always good to think about tile layout even when you are roughing in framing and plumbing. If at all possible, I love getting everything line up with the grout lines in a way that’s pleasing to the eye, which usually means avoiding any small or awkwardly cut tiles.
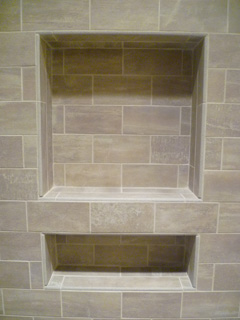
For this project I actually pre-planned where the grout lines would be so that the niches would fit into the layout accordingly. You can see what I mean in the photo. In this case, it would be better if the niche was slightly larger than smaller. If it was too small, I’d have tiny pieces around the edges and it would look like I hadn’t planned very well!
Lots more about this project at this post.

